Introduction
- Thank you for choosing the Shortie app. We are pleased to have you with us. Enclosed is the documentation to help you set up and launch the app easily. Please read it carefully, as it contains important information. If you need any assistance or have questions, our support team is just a message away.
Prerequisites
- You can use any other server as well DigitalOcean is just our recommendation. Just make sure your VPS server does not have any control panel installed (e.g., cPanel, aaPanel), and the operating system should be Ubuntu 22.04
- If you prefer to install all services manually instead of using our ready install.sh script, please make
sure to install the following services on your server:
- Node.js (via NVM)
- Nginx (Web Server & Reverse Proxy)
- MongoDB (Database)
- PM2 (Process Manager for Node.js)
- Certbot (Let’s Encrypt for SSL Certificate)
- npm (Node Package Manager)
- curl or wget (For downloading resources)
- snap (Used to install Certbot)
Create DigitalOcean Account
- Create your VPS Server on Digital Ocean and receive $200 in credits for 2 monthsClick Here

Server Setup
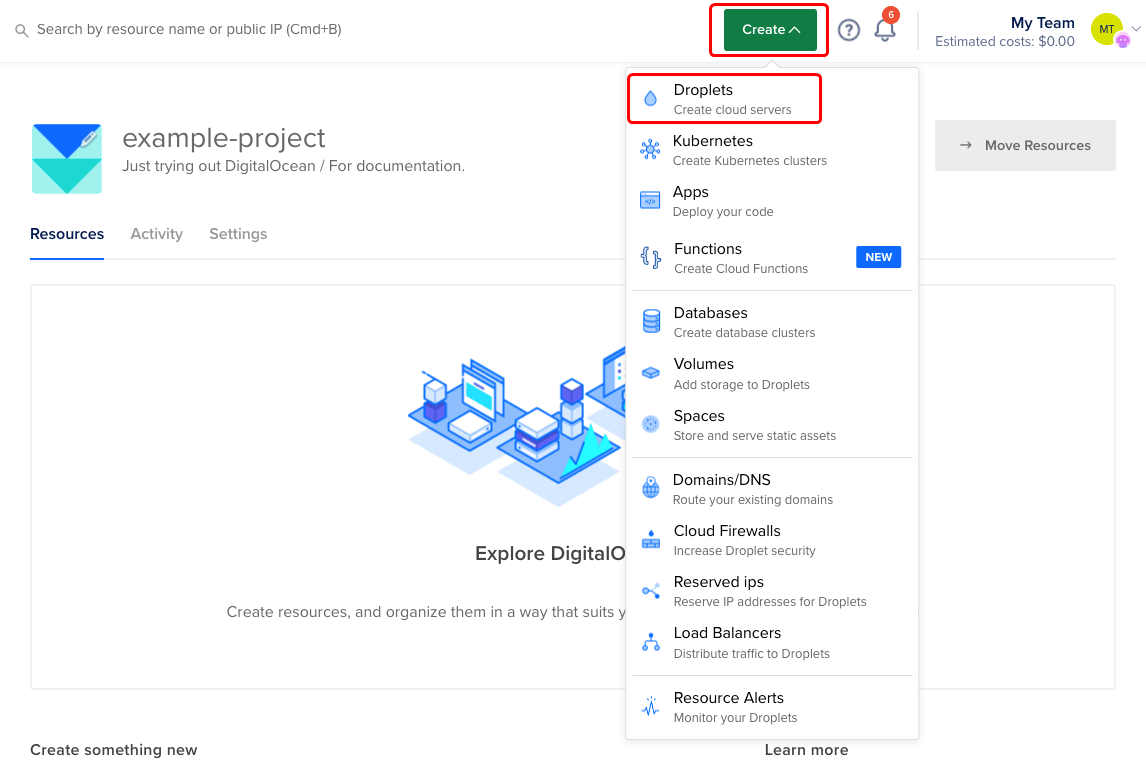
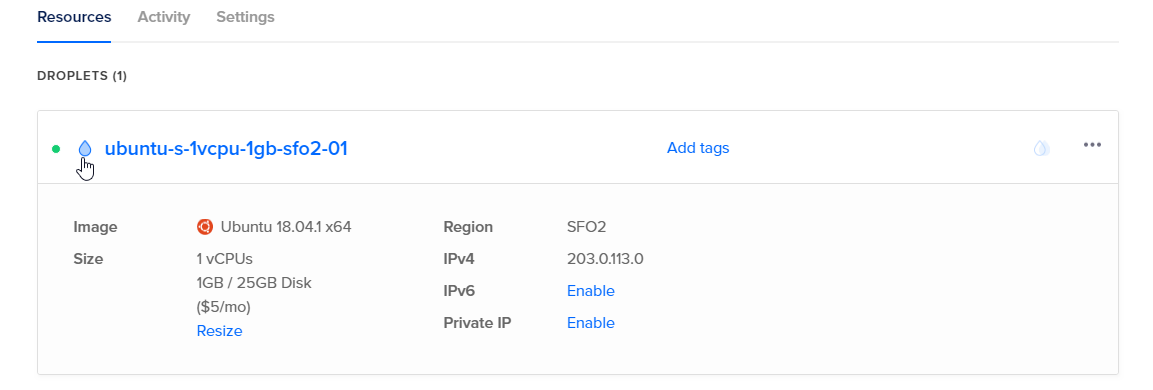
Step 1 : Create Droplet in Control Panel
- Please click on the "Create" button located in the top right corner to open the create menu.
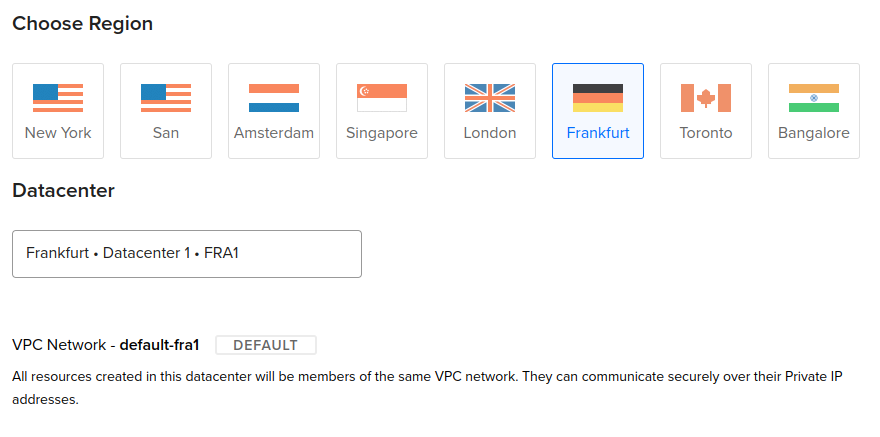
Step 2 : Choose Region
- In the "Choose Region" section, please select the region where you would like to create your Droplet.
Step 3 : Choose an image
- In the "Choose an image" section, you can select the image you wish to use for your Droplet.
- Please ensure that you select the Ubuntu operating system with version 22.04 for your Droplet.

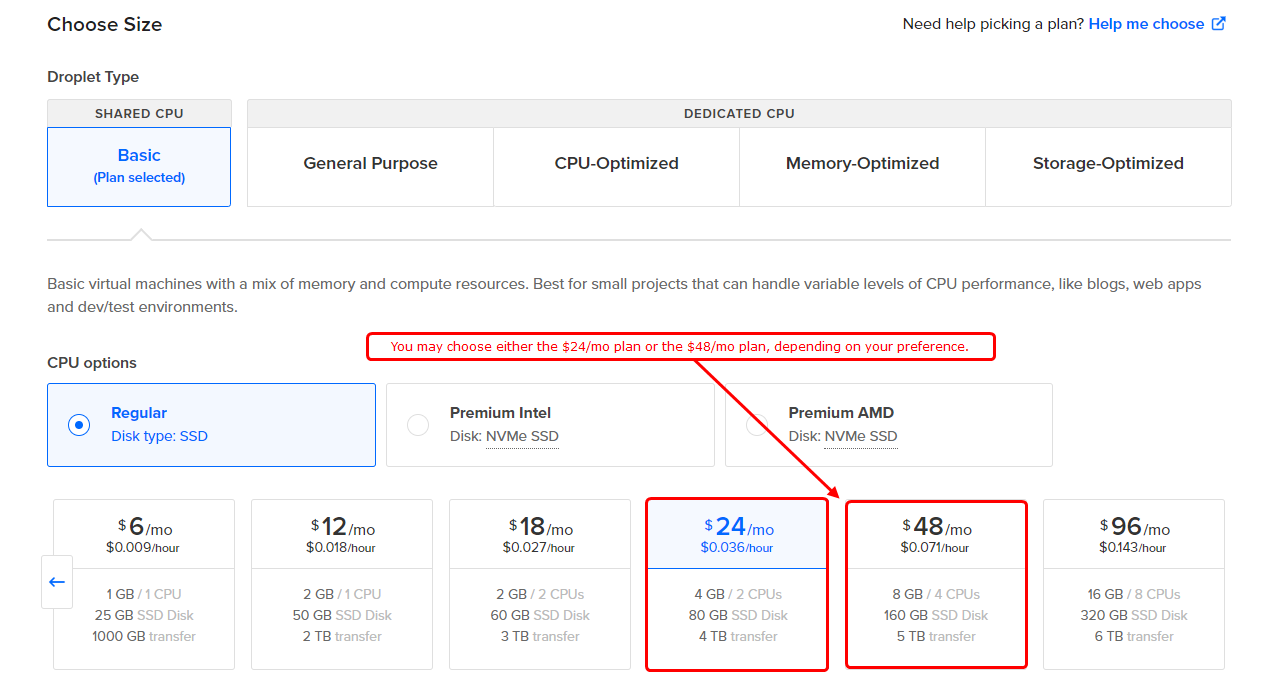
Step 4 : Choose Size
- In the "Choose Size" section, you can determine the amount of RAM, storage space, and CPU cores for your Droplet.
Step 5 : Enable Backups
- You have the option to enable "Automatic Backups" for the Droplet, which will incur an additional cost based on the frequency of the backups.

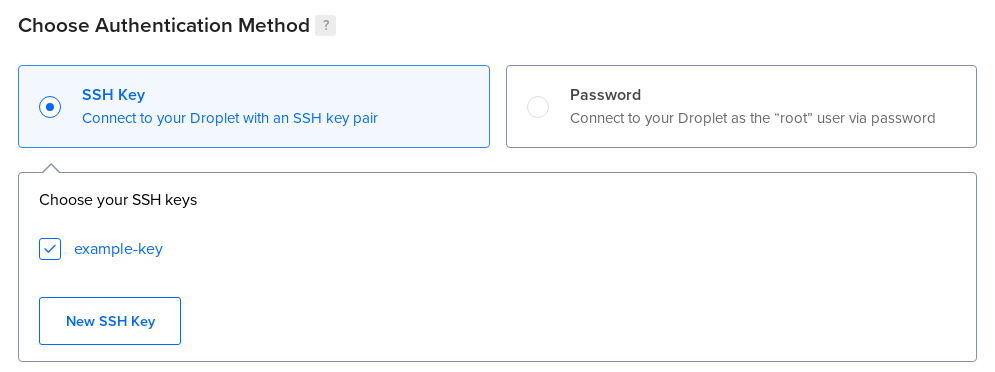
Step 6 : Choose Authentication Method
- In the "Choose Authentication Method" section, select the preferred method for logging in to your Droplet.
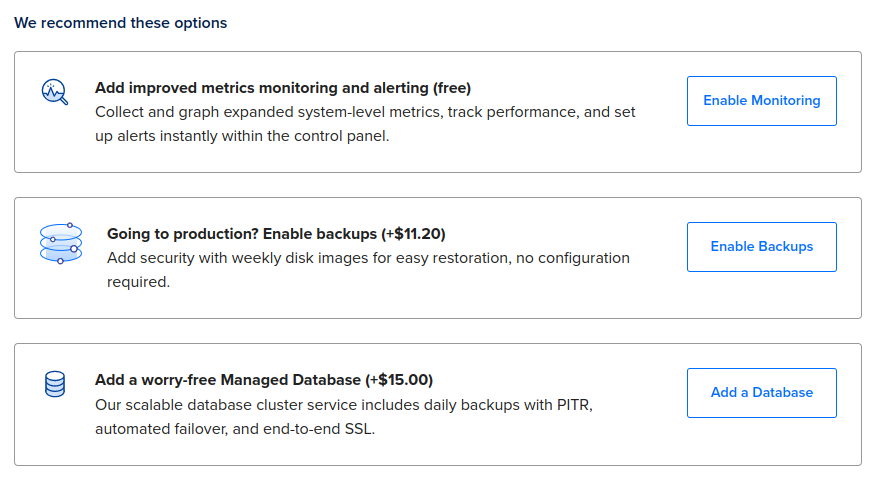
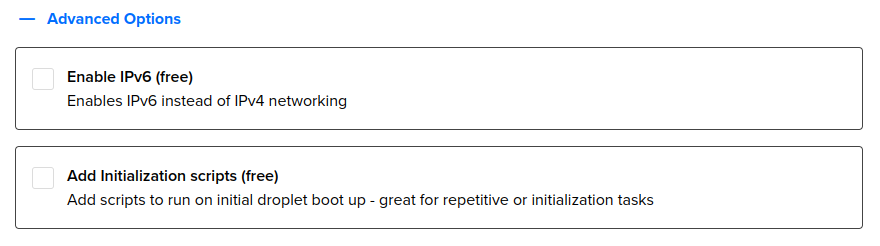
Step 7 : Recommended and Advanced Options
- In the "We recommend these options" section, you have the opportunity to enable various optional services that enhance the functionality of your Droplet.
- Additional options are accessible by expanding the "+Advanced Options" section.
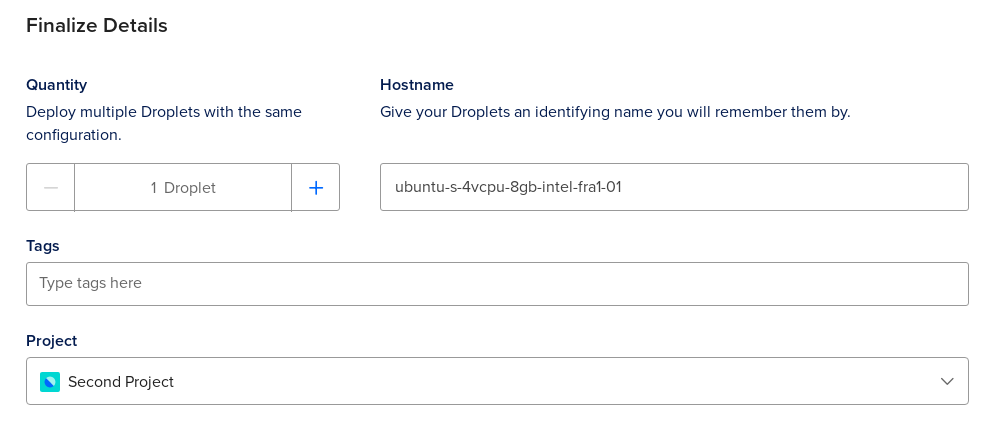
Step 8 : Finalize Details
- In the "Finalize Details" section, you can specify the quantity, name, tags, and project for the Droplet you are creating.
- After selecting your options, please click on "Create Droplet". A progress bar will then indicate the status of your Droplet's readiness.
- Once the Droplet setup is complete, its IP address will be displayed in the control panel.
- Once you have obtained the IP address, you can establish a connection to your Droplet using SSH.


Domain Setup
Step 1 : Log in to your domain provider account
- Examples include GoDaddy, Namecheap, Google Domains, or Hostinger.
Step 2 : Navigate to the DNS management section
- This section might be labeled differently depending on your provider but look for "DNS Management," "DNS Settings," or similar.
Step 3 : Create an 'A record'
- Host: Enter the subdomain name, such as "admin."
- IP Address: Enter your server's IP address.
- TTL (Time to Live): You can typically leave this as the default setting (e.g., "Automatic").
Step 4 : Save the changes
- Look for a button or option to save or apply the changes, such as "Save All Changes."
- Following these steps should correctly create an A record for your subdomain.
How To Get Secret Key
- To enhance the security of our code, we should generate a strong secret key using a reliable source likehttps://randomkeygen.com/.
How To Get JWT Secret Key
- To enhance the security of our code, we should generate a strong secret key using a reliable source likehttps://randomkeygen.com/.
- The JWT Secret Key should be a randomly generated key for instance, "kY4fai9sUT" is an example of such a JWT Secret Key. This key is essential for securing and validating JSON Web Tokens (JWTs) within our application.
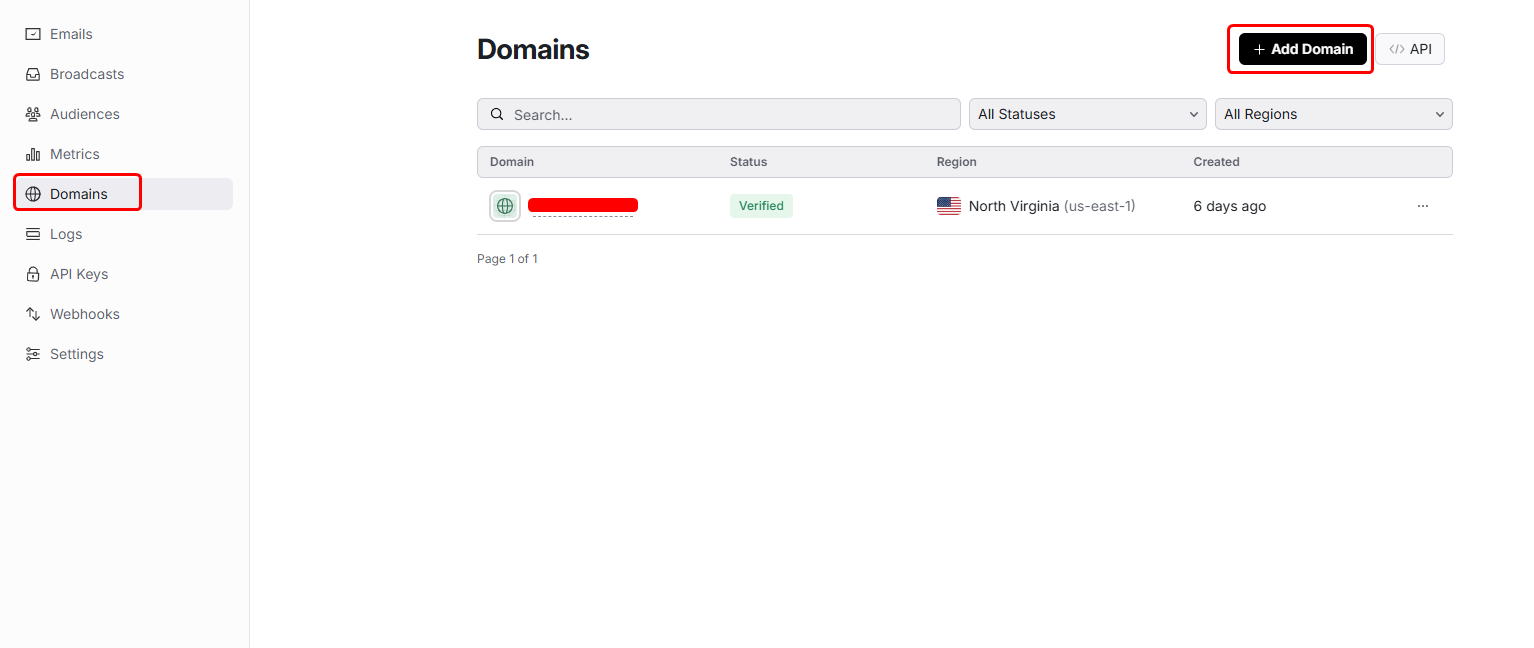
SetUp Resend
- You need to create an account atResend
- You also need to add a domain for sending emails, as shown in the image below. For reference, please see the Resend domain setup documentation.Resend
- Once the domain is verified, you will be able to send emails.
- After domain verification, make sure it is stored securely.
- When running the install.sh script, you will be prompted to enter your Resend email values. Please provide them in the following format: yourProject_name@your_domain (e.g., [email protected]).
Web Firebase Setup
- Follow the steps outlined in thedocumentationto create a Firebase project, register a Web app, obtain the Firebase configuration object, and generate the required key pair.
- During the execution of install.sh, you will be asked for the Web Firebase credentials. Please enter them one by one.
Extract The Project
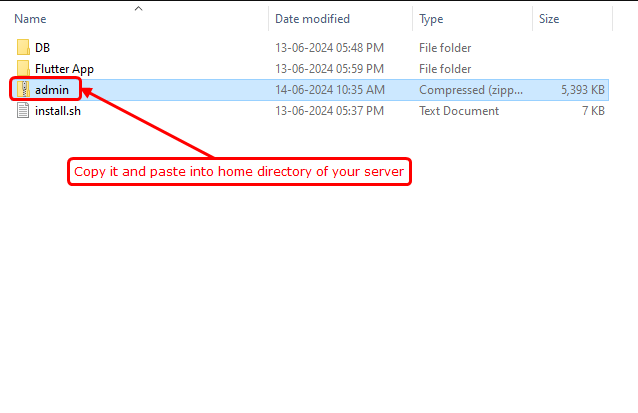
- Connect to the server via SSH using tools like WinSCP for file transfer and PuTTY for command line access.
- Please transfer the code zip file to the home directory of your server.
- First, install the library using the following command:
- After navigating to the home directory path, use the following command to unzip the code zip file:
apt install unzip
cd /home
unzip code.zip -d /home
clear
Admin Panel Setup
- After navigating to the root path, use the following command:
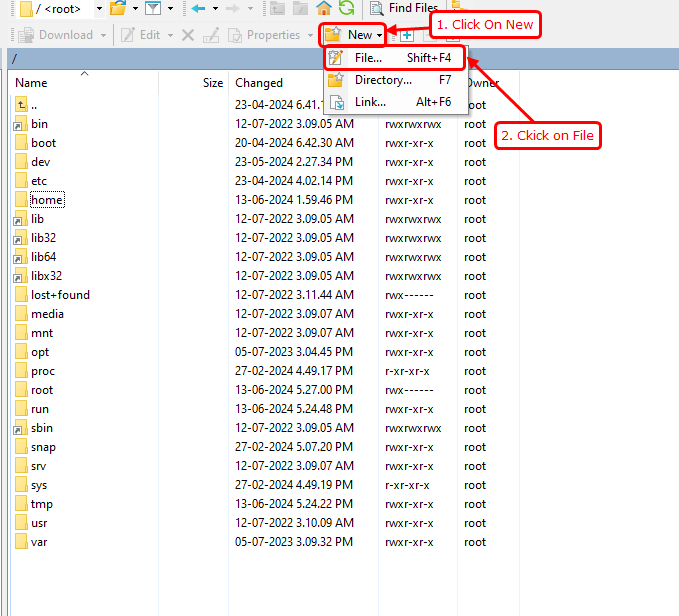
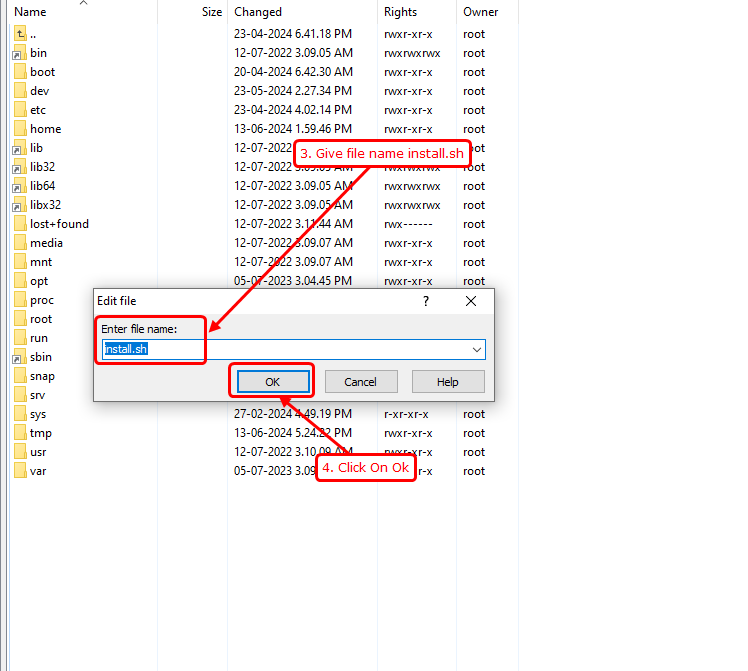
- How to upload and paste the 'install.sh' file using WinSCP, as shown in the image below.
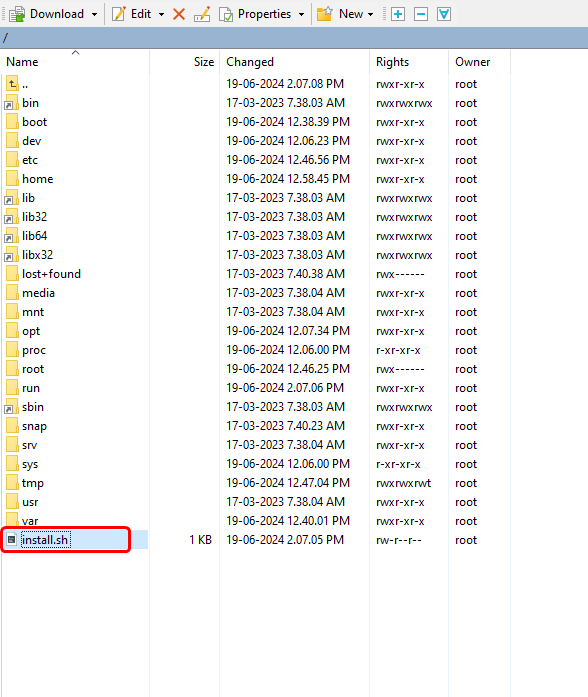
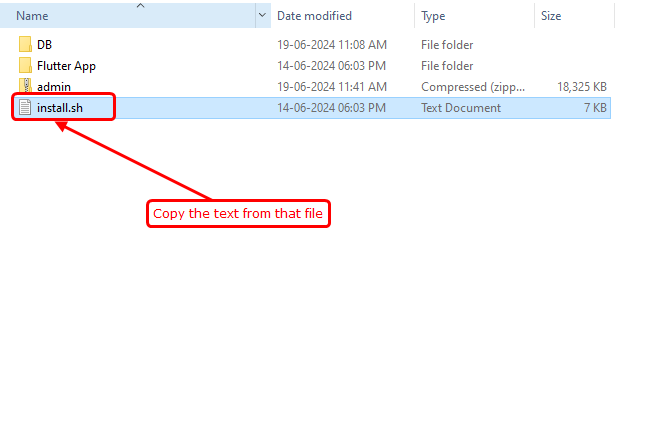
- After creating the install.sh file, it should be displayed as follow.
- After, Copy the text from the install.sh file provided by us.
- After copying the text from the install.sh file, paste it into the server's install.sh file.
- Then, run the install.sh file using the following command:
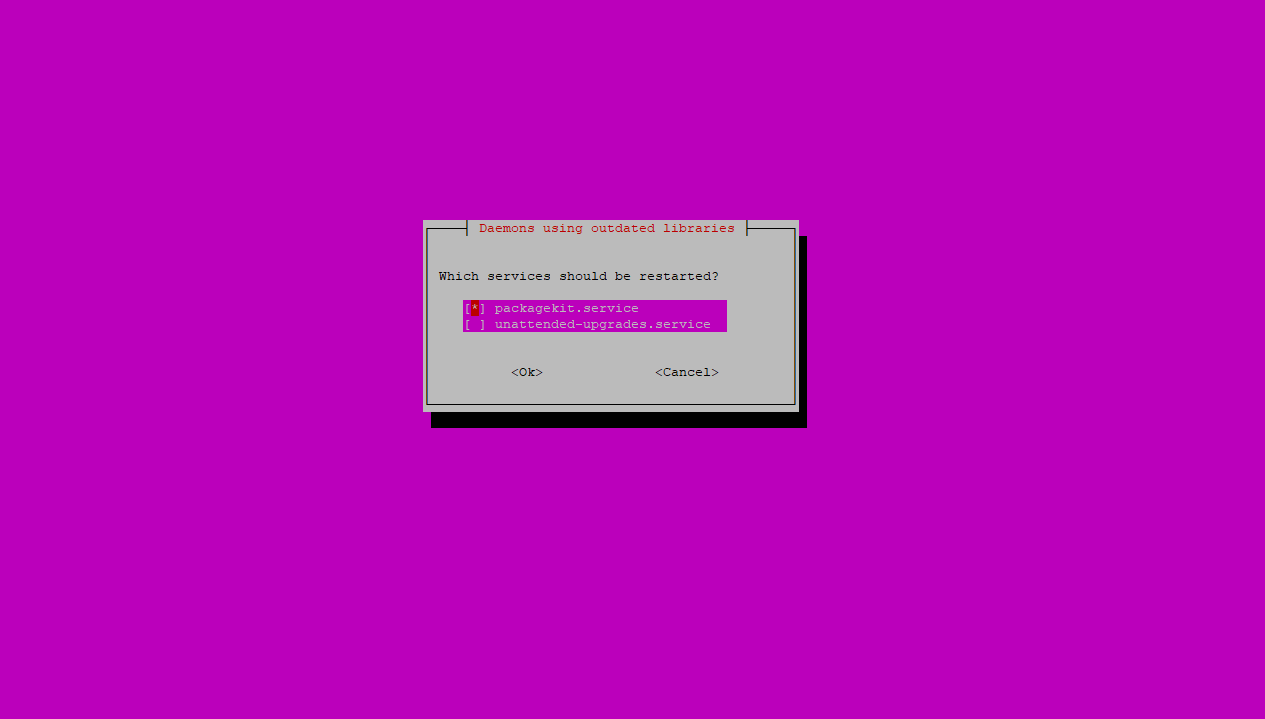
- During the installation process, you will see a prompt similar to the image below. Press 'Enter' to proceed.
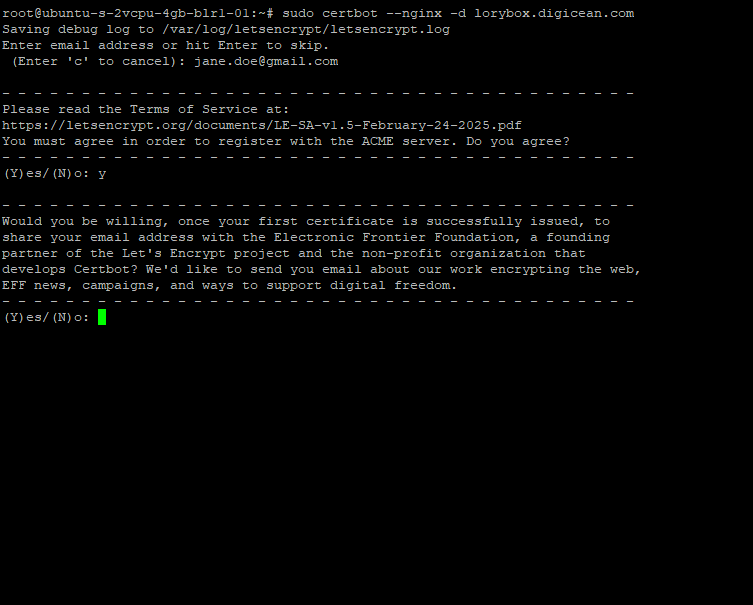
- When installing SSL, you will be prompted to enter your email address, as shown in the image below. Please provide your email to continue.
- You will be asked twice to confirm the transfer to HTTPS. Enter 'y' to proceed.
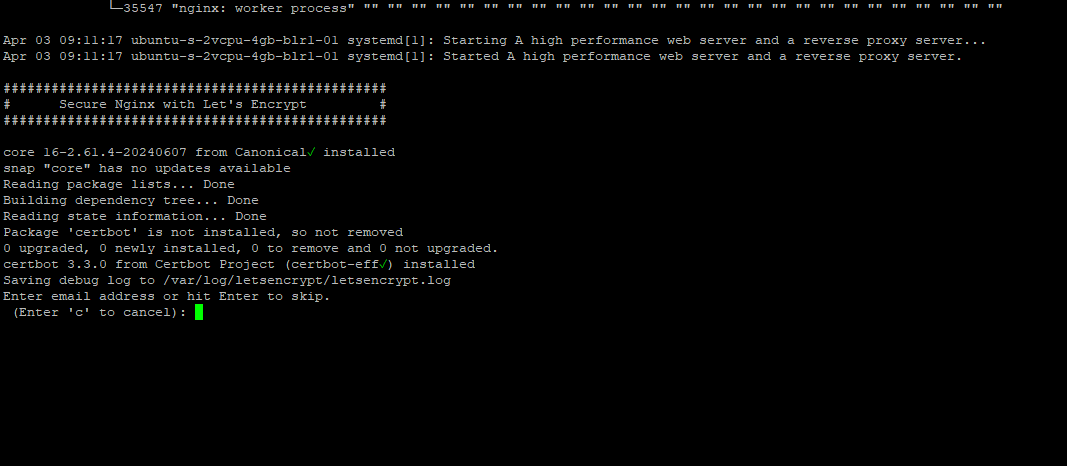
- Upon successful execution of the install.sh file, you will receive the following information:
- Download MongoDB Compass from the official website:MongoDB Compass Download
- Open MongoDB Compass after installation.
- After successfully executing the install.sh file, you will receive the MongoDB connection string. Please copy it for further use.
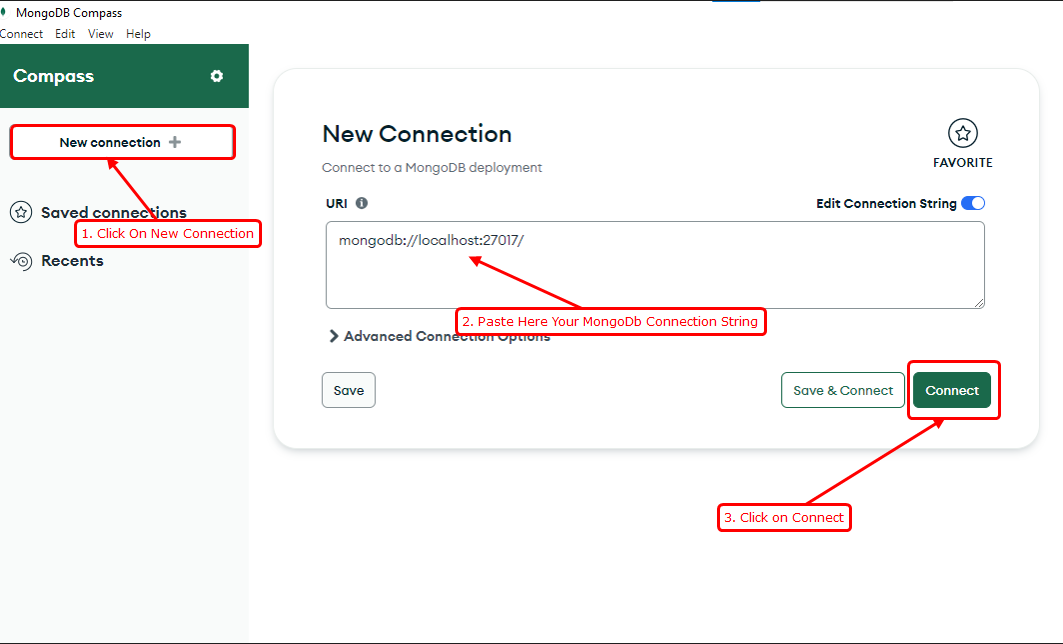
- Click on "New Connection" to set up a new connection to your MongoDB server.
- Enter the MongoDB connection string provided by your hosting provider.
- Click "Connect" to establish the connection to your MongoDB database.
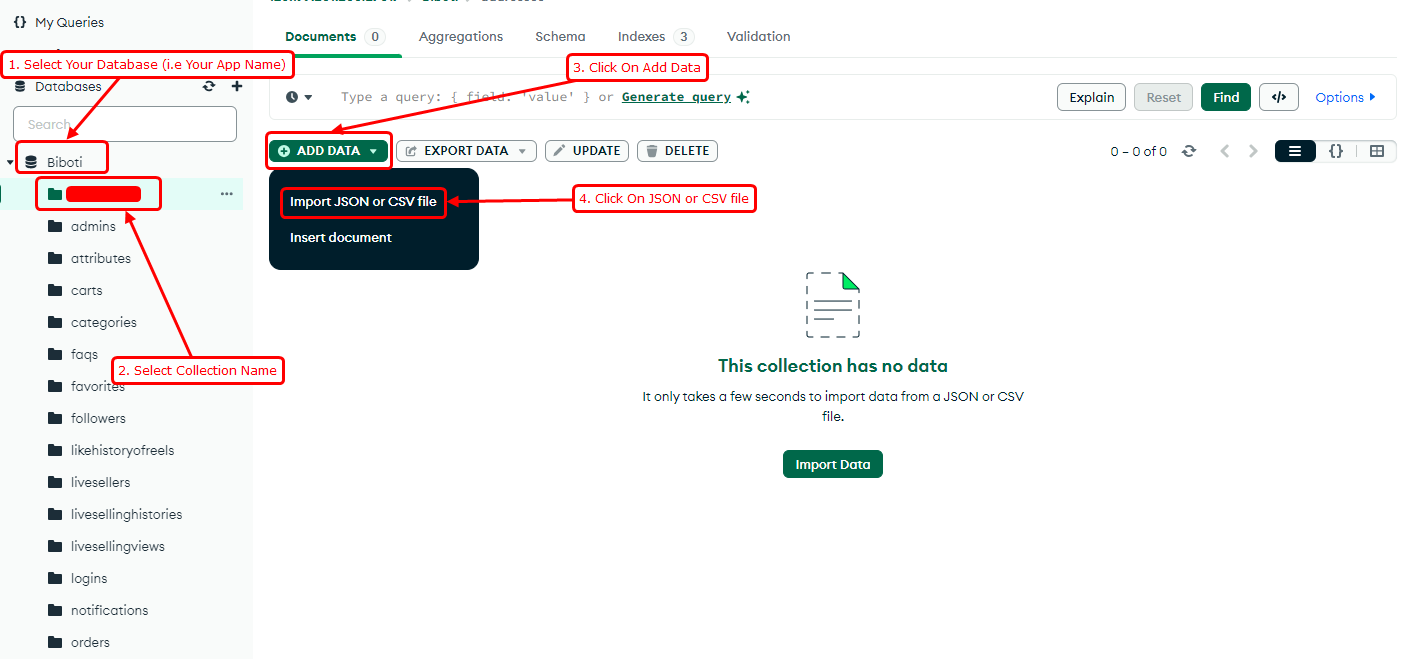
- Once connected, MongoDB Compass will display your databases. Select the your database where you want to import the JSON files.
- Click on the your database name to expand and view its collections.
- Select the collection where you want to import the JSON files.
- Click on the "Collection" tab and then click on the "Add Data" button.
- Choose "Import JSON or CSV File" from the dropdown menu.
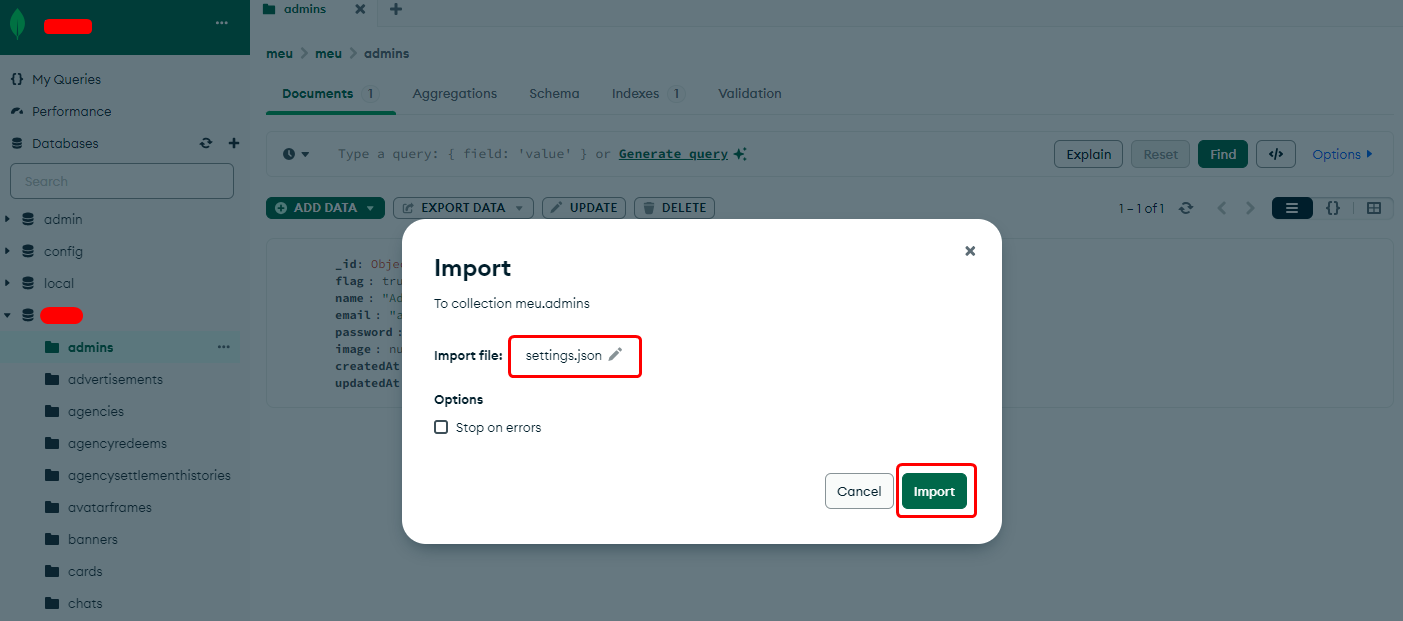
- Navigate to the folder where your JSON files are located in the extracted folder.
- Select the JSON files you want to import.
- Click "Import" to start importing the JSON files into your MongoDB database.
- You need to import the collections currencies, reportreasons, settings into your database.
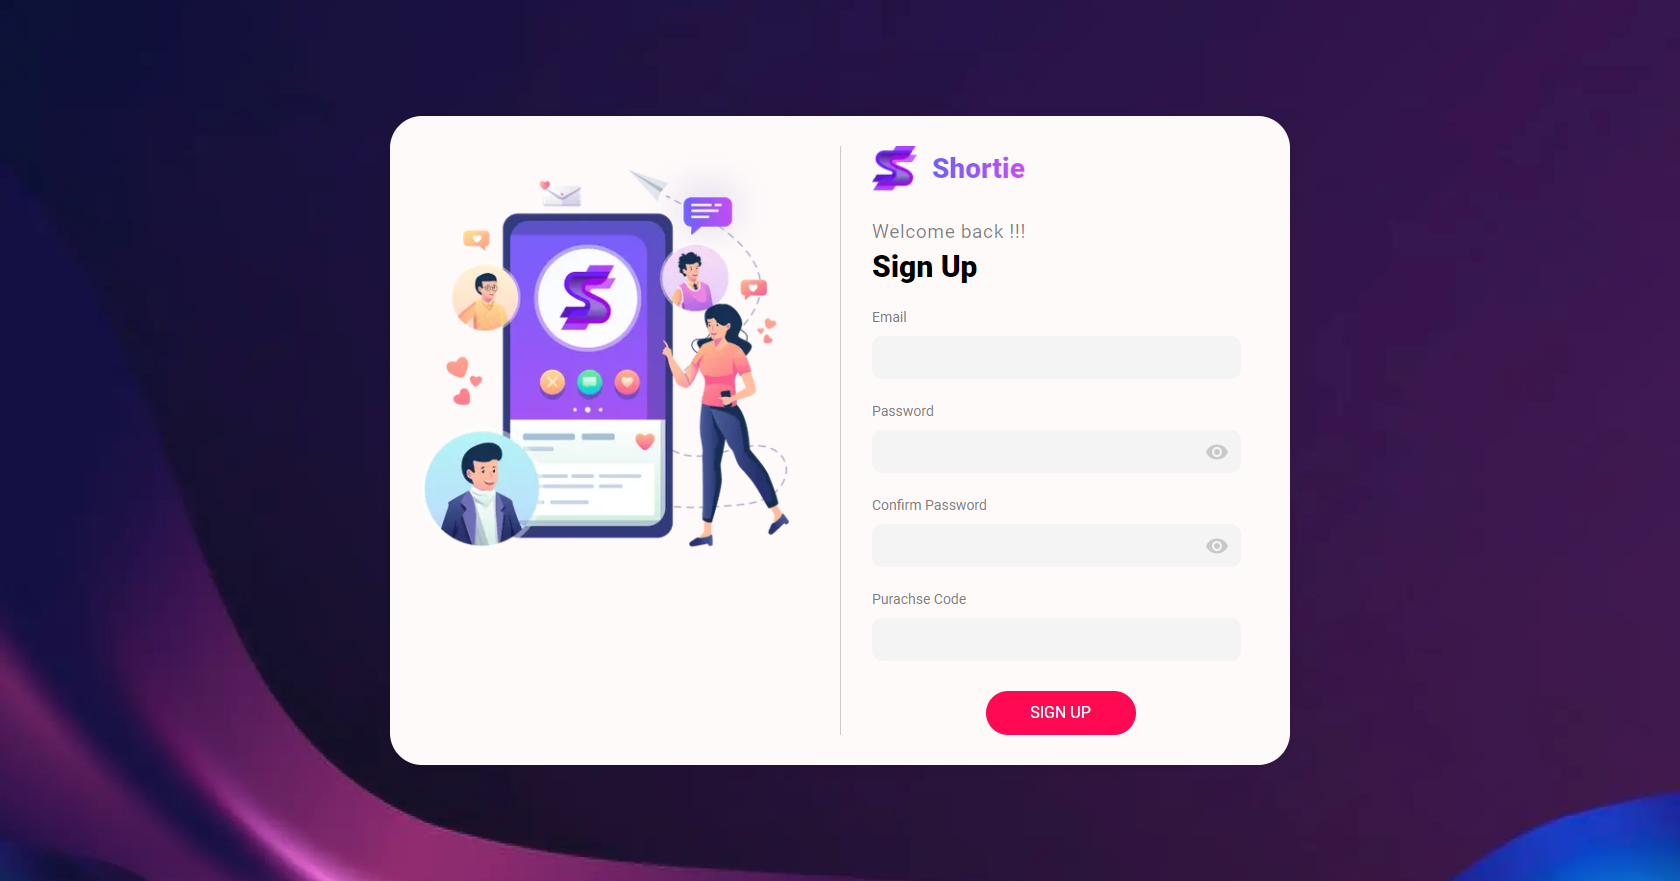
- Please note that the admin must sign up first, as shown in the image below.
- Enter your email address.
- Create a secure password.
- Verify the password.
- Enter a unique code for registration security.
- Click here to get your purcahsed code from codecanyon.
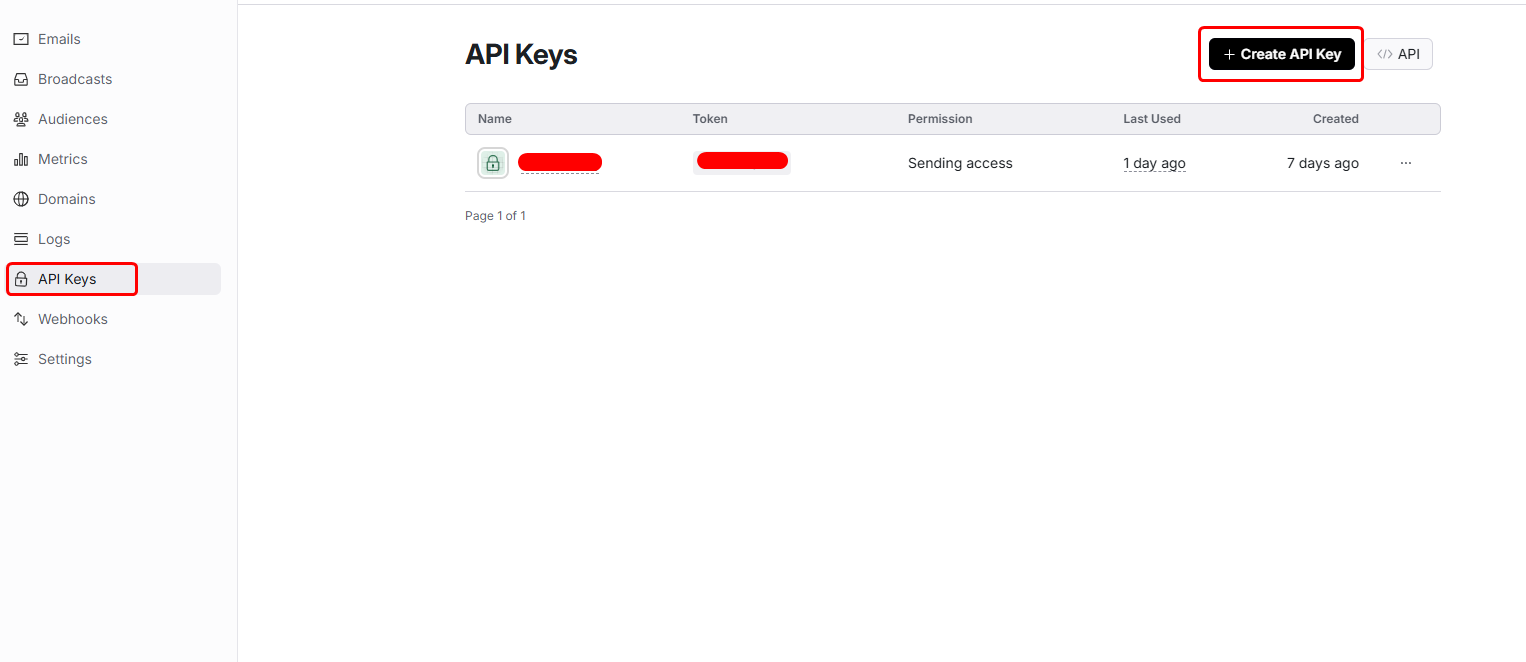
- You will need to create an API key as shown in the image below. For reference, please refer to the Resend API Key documentation.Resend
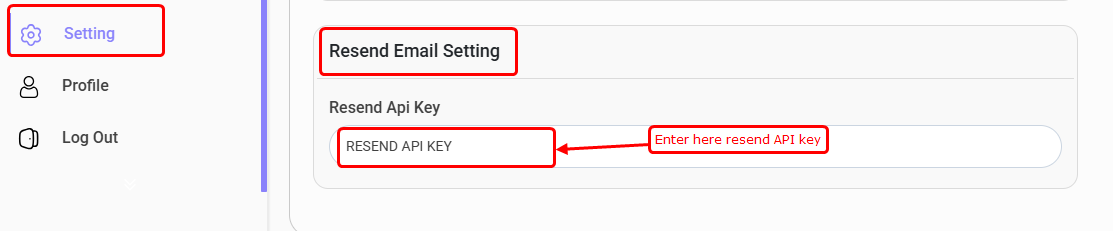
- Once the API key is generated, update it in the settings, as demonstrated in the image below.
-
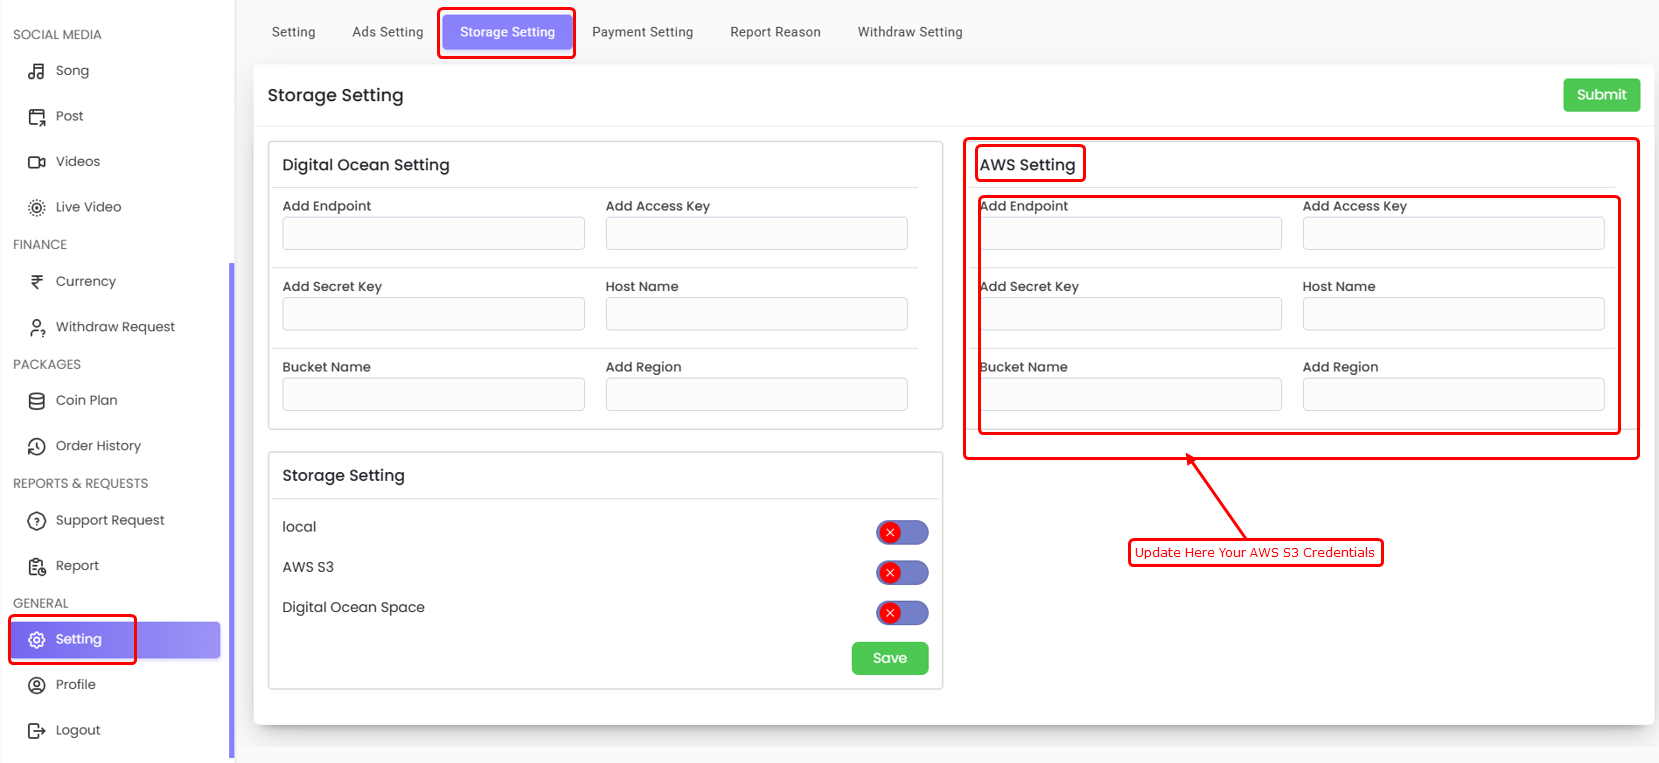
AWS S3
- FollowThis Guideand create AWS S3 Bucket and get API Keys and other credentials.
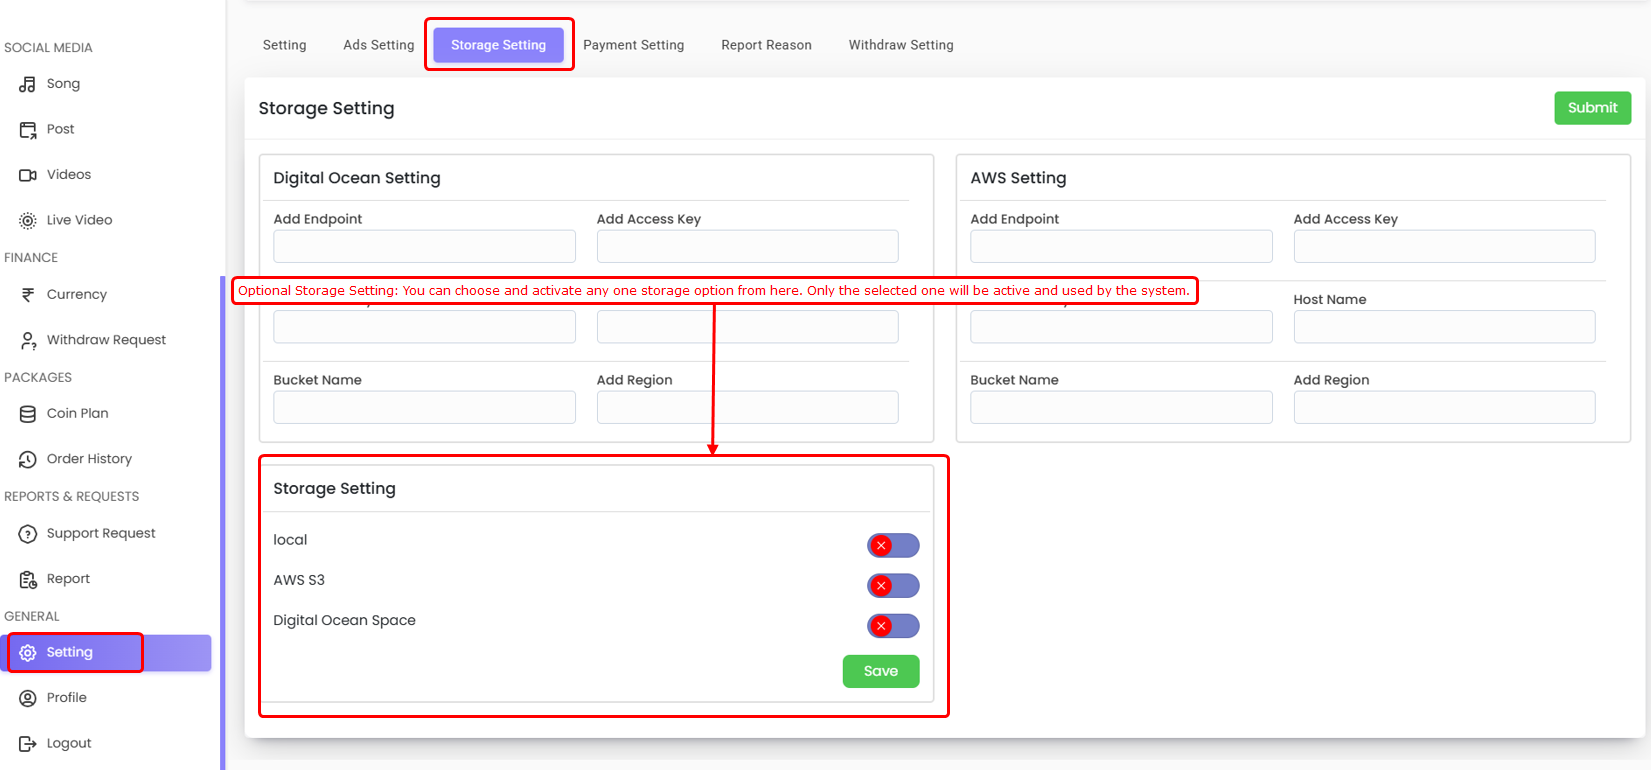
- Once all credentials are collected, navigate to Settings → Storage Settings → AWS S3 Settings in the admin panel and enter the credentials there.
-
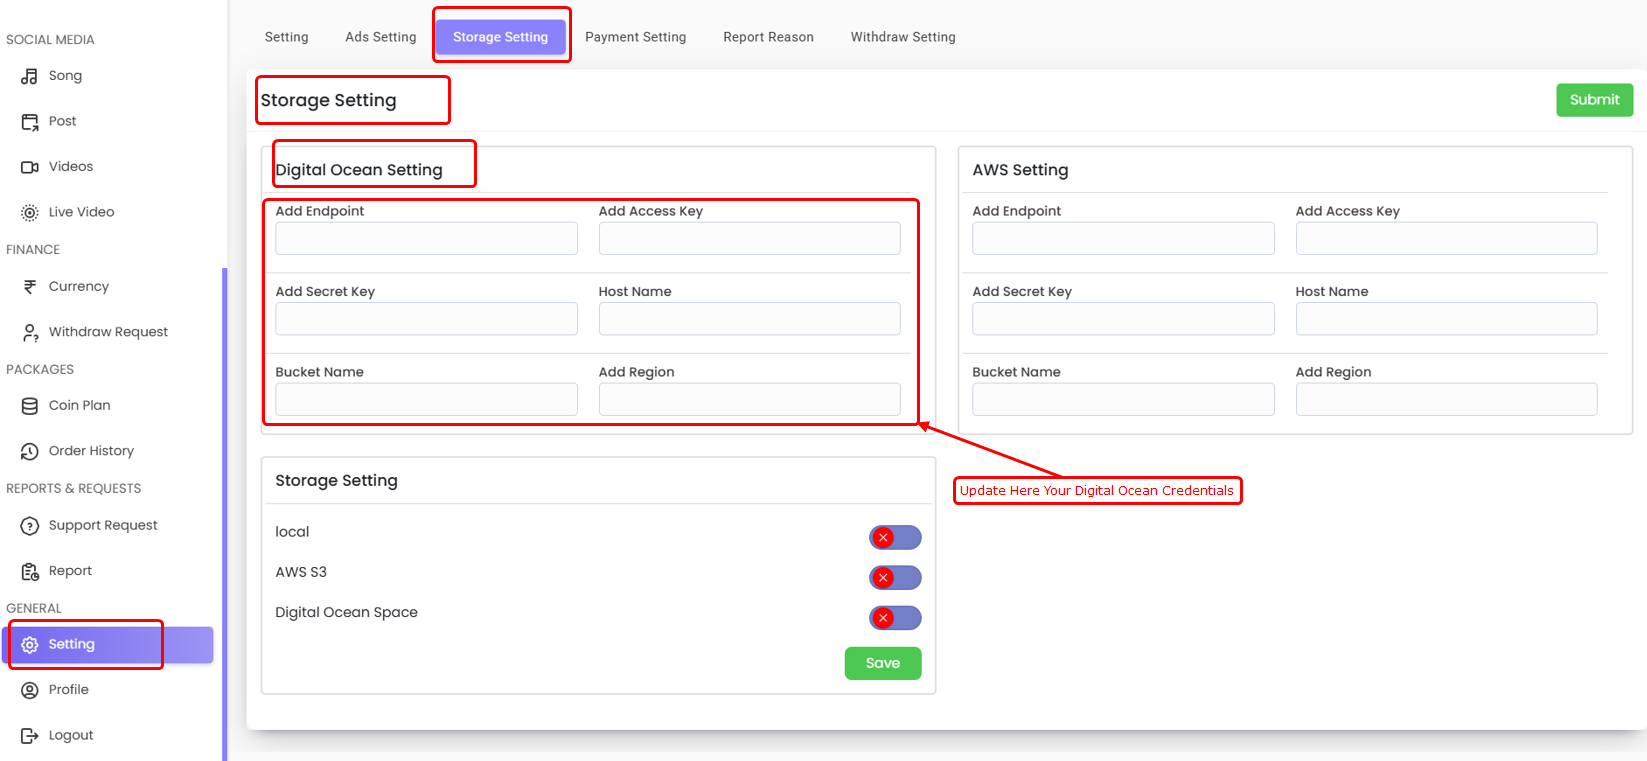
DigitalOcean
- FollowThis Guideand ccreate Digital Ocean Space Bucket and get API Keys and other credentials.
- Once all credentials are collected, go to Settings → Storage Settings → DigitalOcean Settings in the admin panel and enter the credentials.
-
Local
- Local storage doesn't require any credentials.
- First, set up the credentials for the storage provider you want to use. Then, choose that provider on the settings page. Only one provider can be active at a time, so you only need to set up the one you plan to use.
- Storage will only work properly if you’ve entered the correct credentials.
- If you face any issues with the code, Please contact here for support: https://wa.me/+919428577490
- Our technical team will review your request and respond within 24–48 hours.
- Thank you for your patience and cooperation.
cd /
sudo apt install dos2unix
chmod +x install.sh
./install.sh


Import MongoDb files
Step 1 : Download MongoDB Compass
Step 2 : Open MongoDB Compass
Step 3 : Connect MongoDB Database
Step 4 : Navigate to Database

Step 5 : Import JSON Files
Admin Panel Sign-Up
Step 1 : Email
Step 2 : Password
Step 3 : Confirm Password
Step 4 : Purchase Code
Admin Forgot Password – OTP
Storage Setting