Introduction
- Thank you for choosing the Buzzy app. We are delighted to have you on board. Enclosed is the documentation to assist you with the setup and launch of the app. Please review it thoroughly, as it contains essential information. Should you require any assistance or have any questions, our support team is readily available to help.
Install Android Studio
- To begin configuring, ensure you have installed Android Studio and the "Java SE Development Kit".
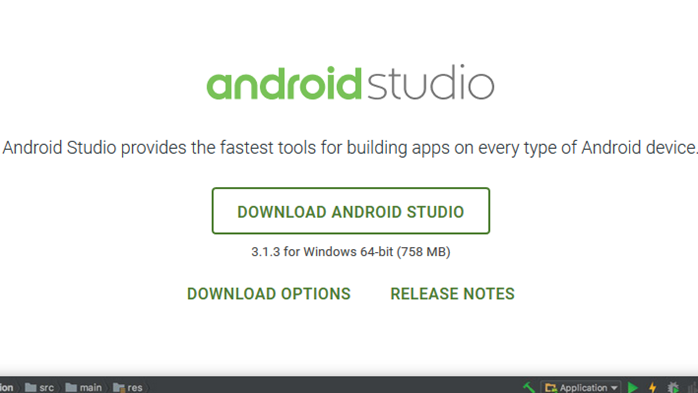
- Firstly, head over toClick Hereto obtain the Android Studio executable or zip file.
- Once on the page, proceed by clicking on the "Download Android Studio" button.
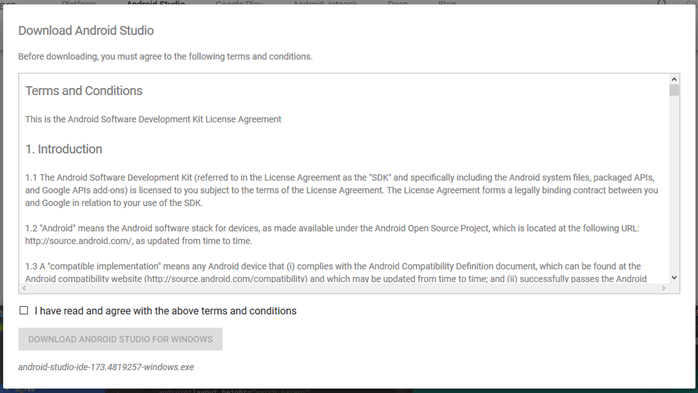
- Please select the checkbox labeled “I have read and agree with the above terms and conditions” before proceeding to download.
- Afterward, click on the download button. Upon doing so, a prompt box will appear; kindly click on the "Save file" button to initiate the download process.
- After the download is complete, navigate to your Downloads folder and proceed to open the downloaded file. This action will prompt a dialogue box to appear.
- Click on the "Next" button to advance.
- In the subsequent prompt, select a suitable path for installation and proceed by clicking "Next".
- Ensure that the chosen installation path meets the minimum space requirements.
- The installation process will commence, and upon completion, the interface will resemble the image displayed below.
- Click on "Next" to proceed.
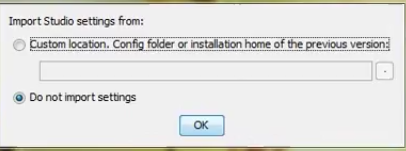
- Upon clicking "Finish", you'll be prompted to decide whether to import previous settings (if Android Studio was previously installed) or not.
- It is recommended to select the "Don't import Settings" option.
- Click the "OK" button to confirm your selection.
- This process will initiate with the launch of Android Studio.
- During this time, Android Studio will launch, and we will begin searching for the available SDK components.
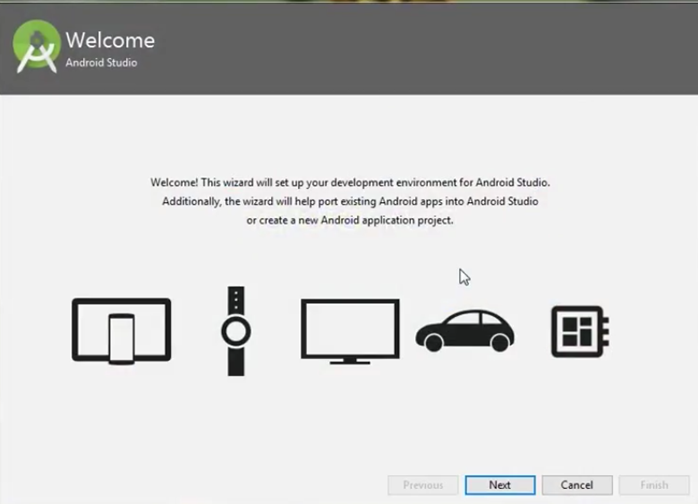
- Once the SDK components have been located, the process will redirect to the Welcome dialogue box.
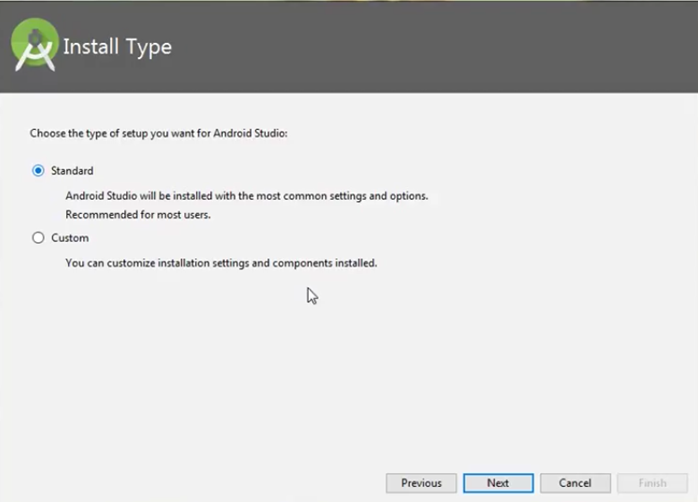
- Select the "Standard" option and proceed by clicking "Next".
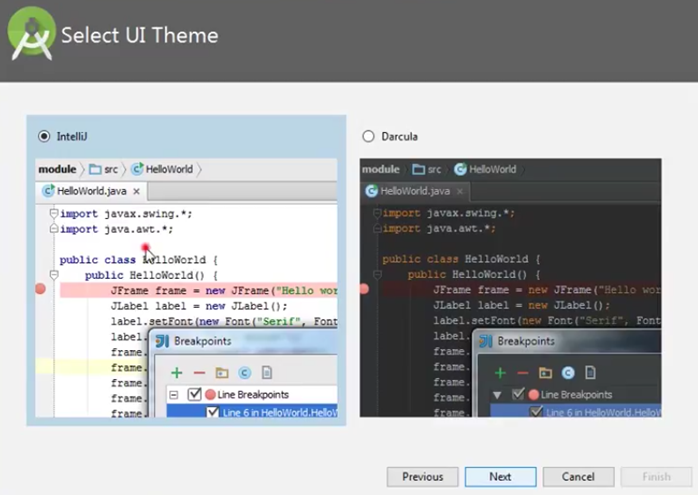
- Now, select your preferred theme: either the Light theme, known as the IntelliJ theme, or the Dark theme, referred to as Darcula. Make your selection accordingly and proceed by clicking the "Next" button.
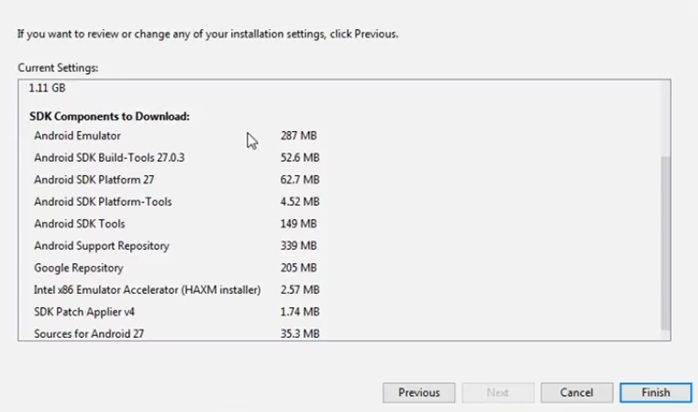
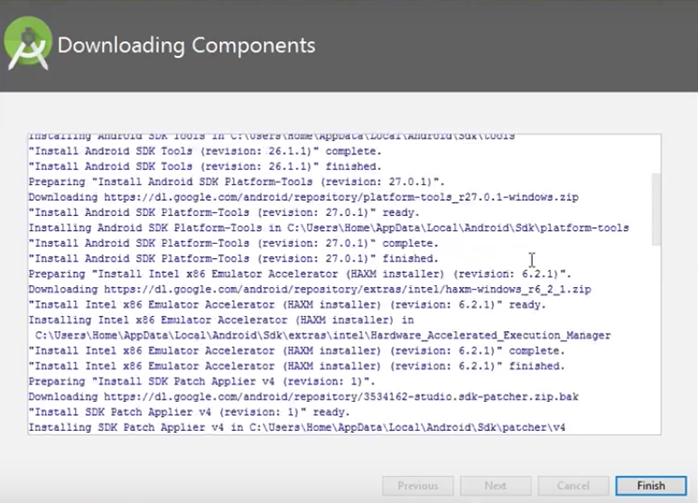
- Now, it's time to download the SDK components. Once the download is complete, click on the "Finish" button to proceed.
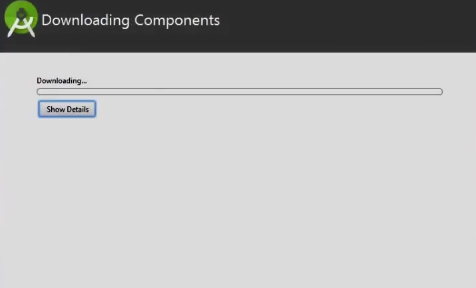
- The download process for the components has now begun.
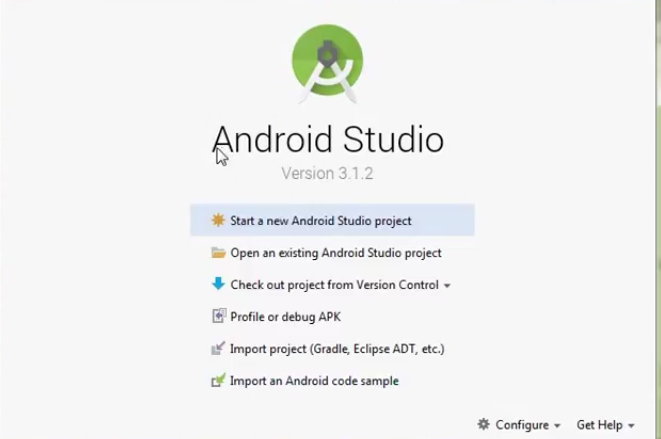
- The configuration of Android Studio is now complete. To launch and begin building apps, simply click on the "Finish" button.


SDK Manager
- The installer, as demonstrated in the video, will automatically download and install all required components. However, if you prefer manual setup, ensure to download at least the following components using the SDK manager:
- SDK tools
- SDK platform Tools
- SDK Build Tools
- Google Play Services
- Android Support Library
- Google Repository
- Google USB Driver
- You can access these components through theSDK Manager.
- Once the installation is complete, open Android Studio to proceed. After successfully installing Android Studio, create a sample app project to ensure that all necessary files are installed onto your computer.
Add Android App To Firebase
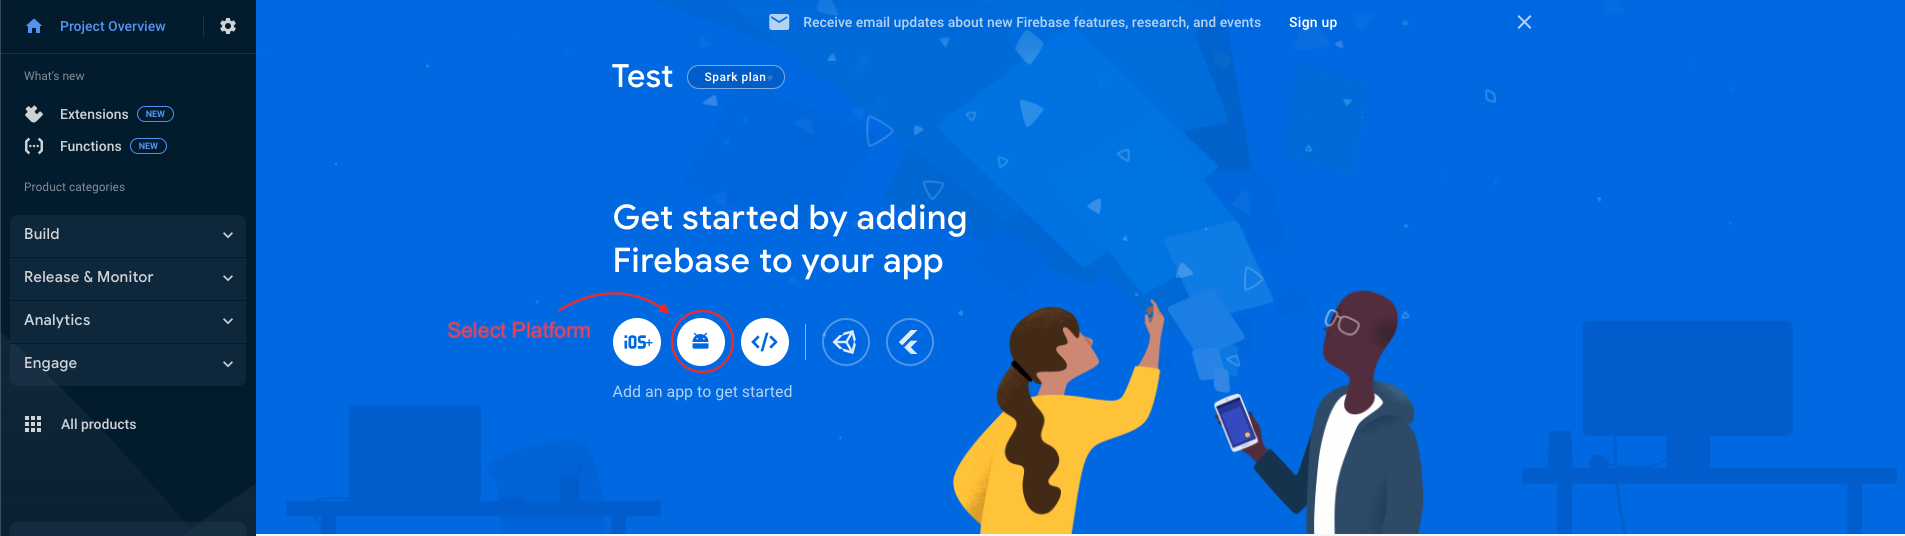
- In the next step, we have to choose the platform to add Firebase to our application. Click on Android.
- The platform can be Android, iOS, Web etc..
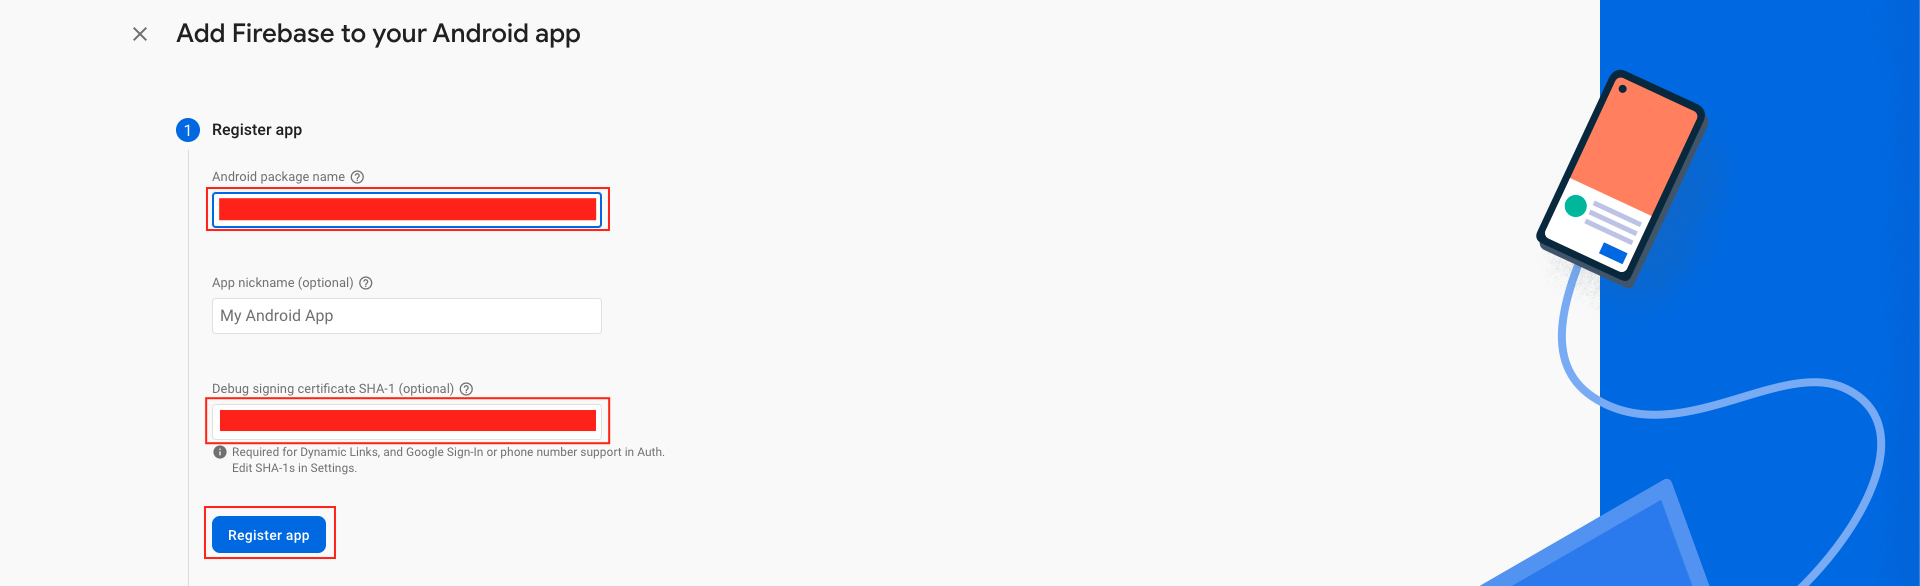
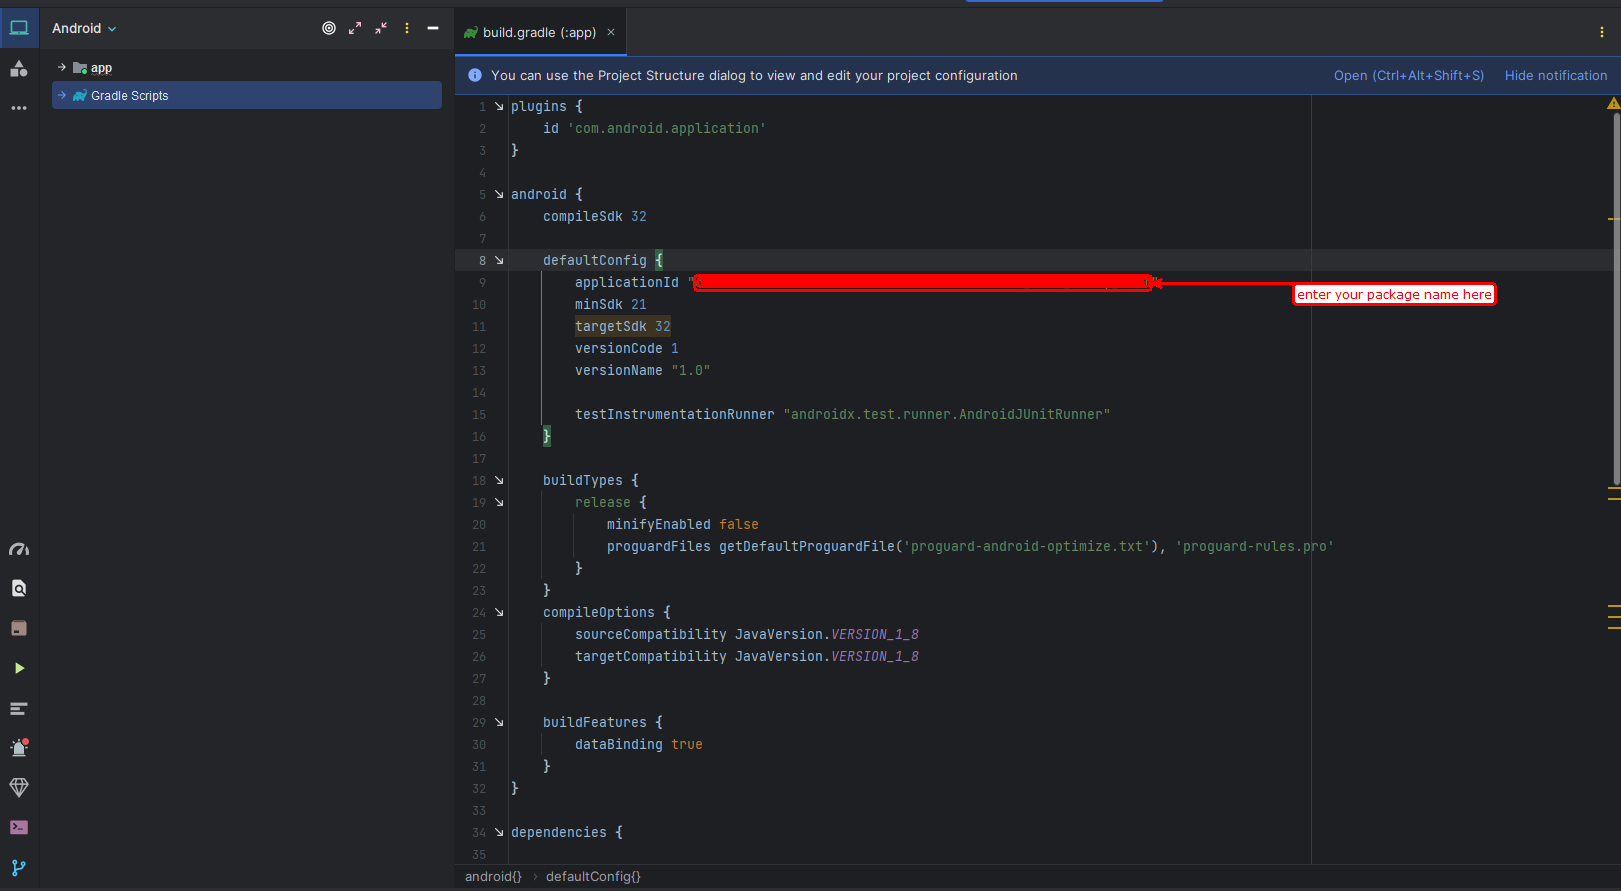
- Your package name is generally the applicationId in your build.gradle (app-level) file
- Refer to thePagefor guidance on utilizing keytool to obtain the SHA-1 hash of your signing certificate.
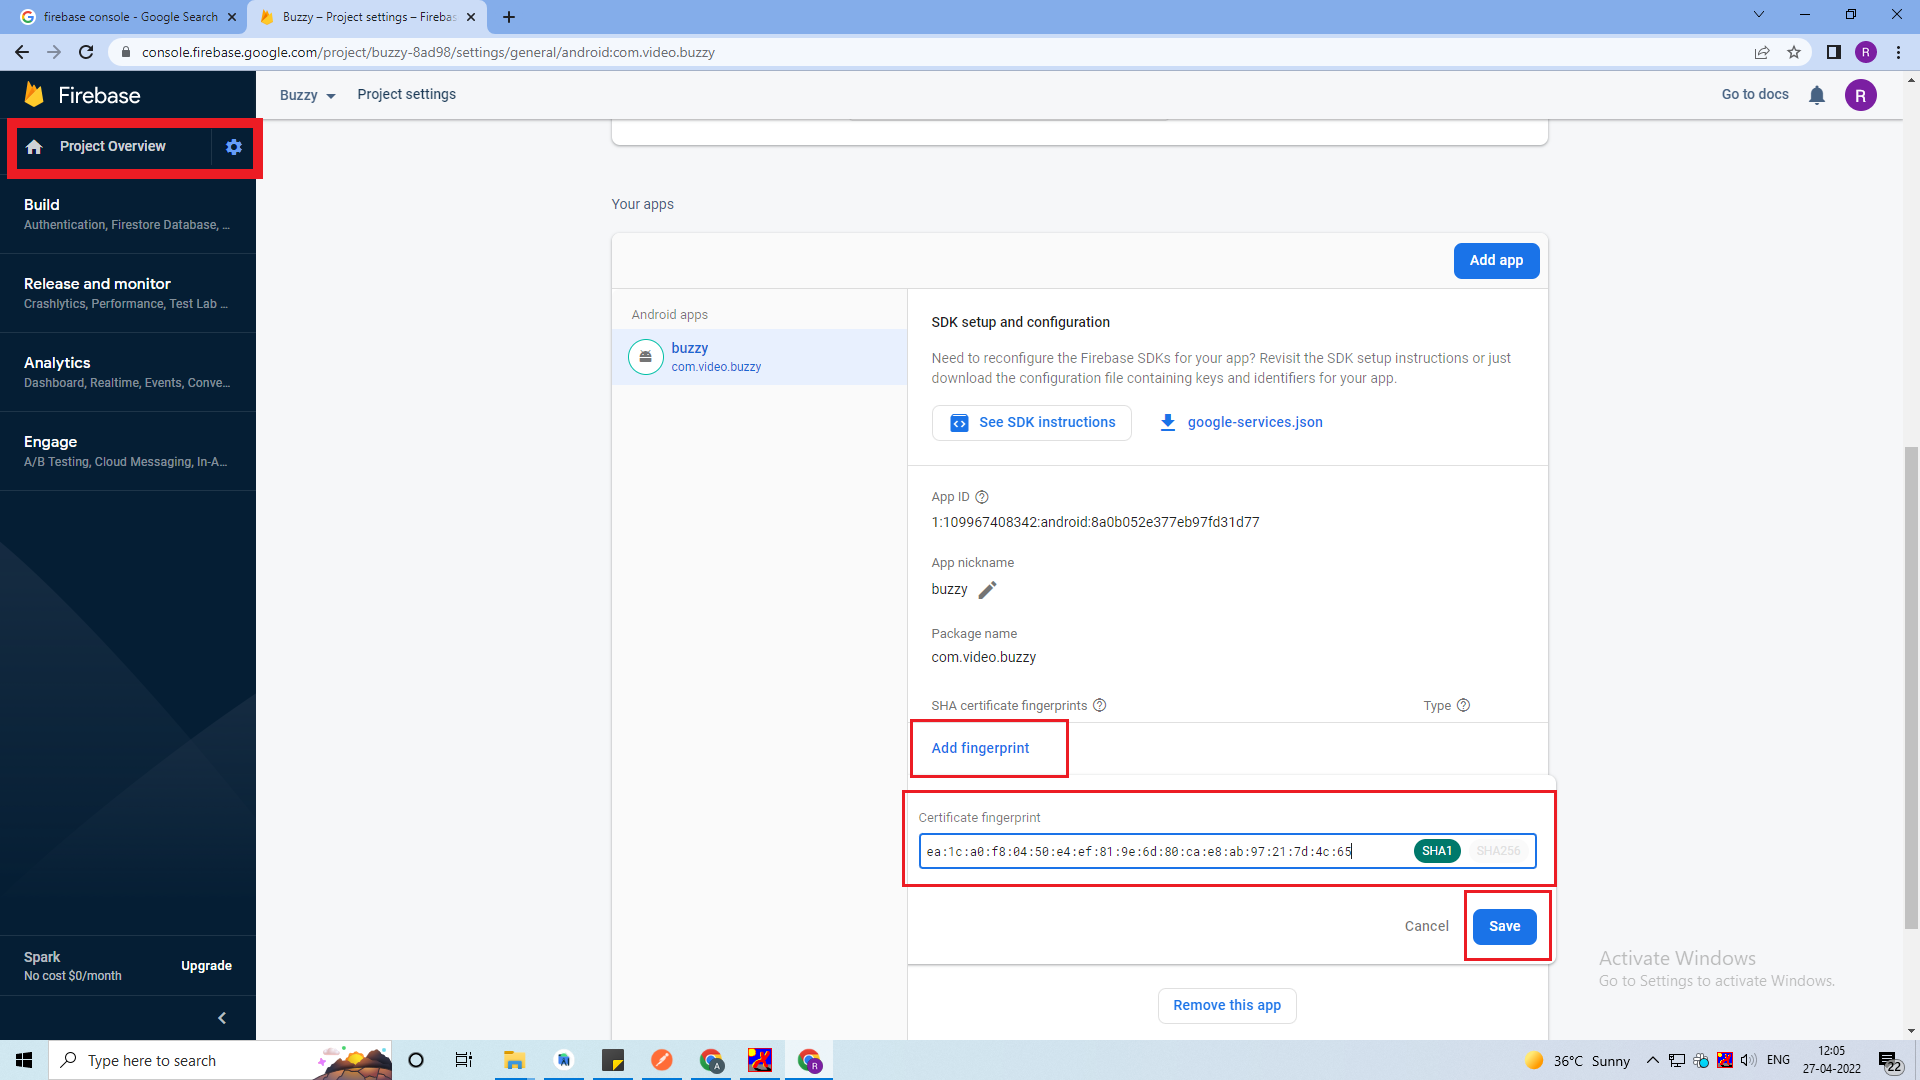
- Add your applicationid in the first field and SHA-1 to the third field as shown in the image below.
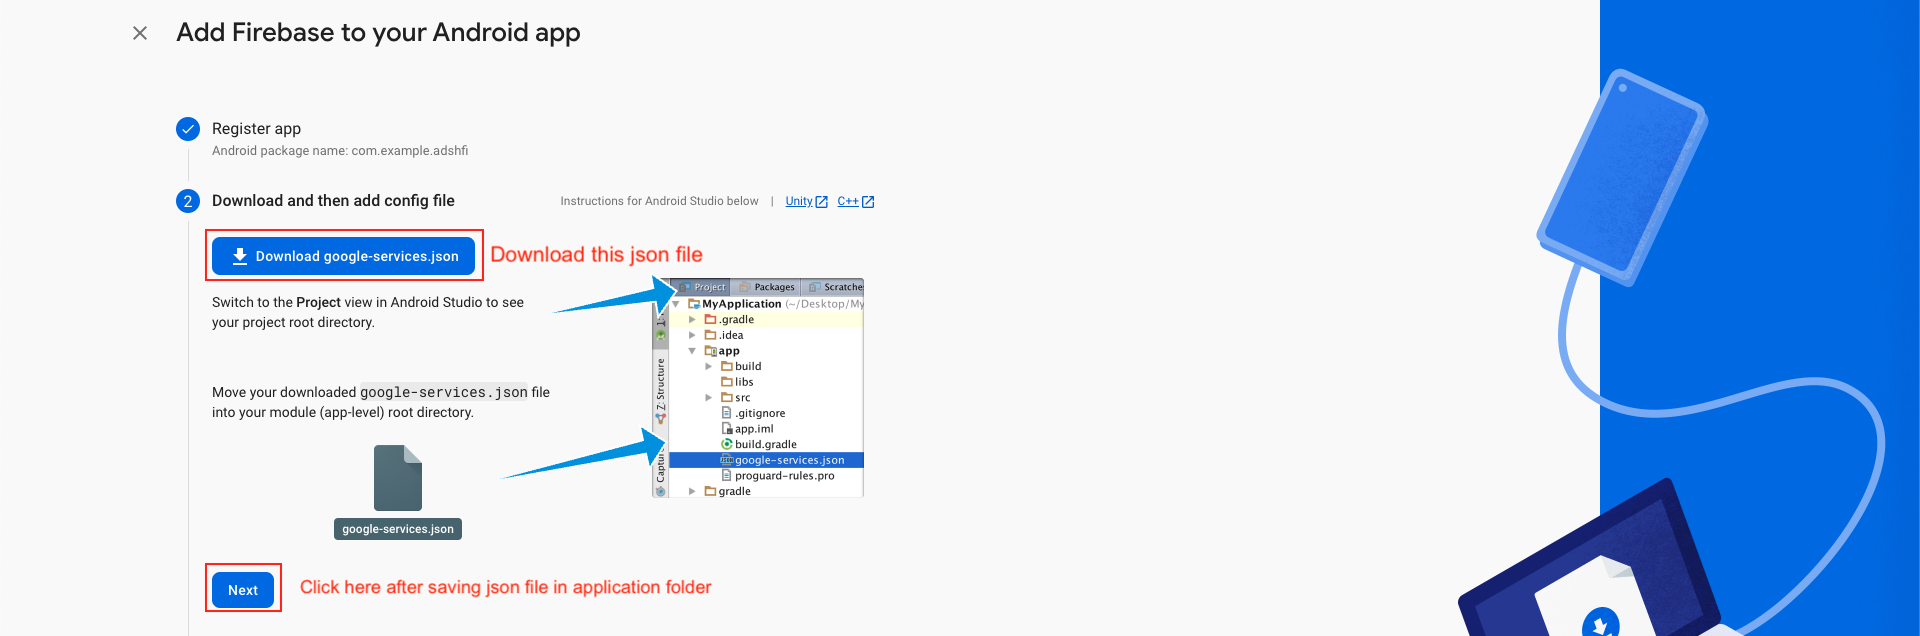
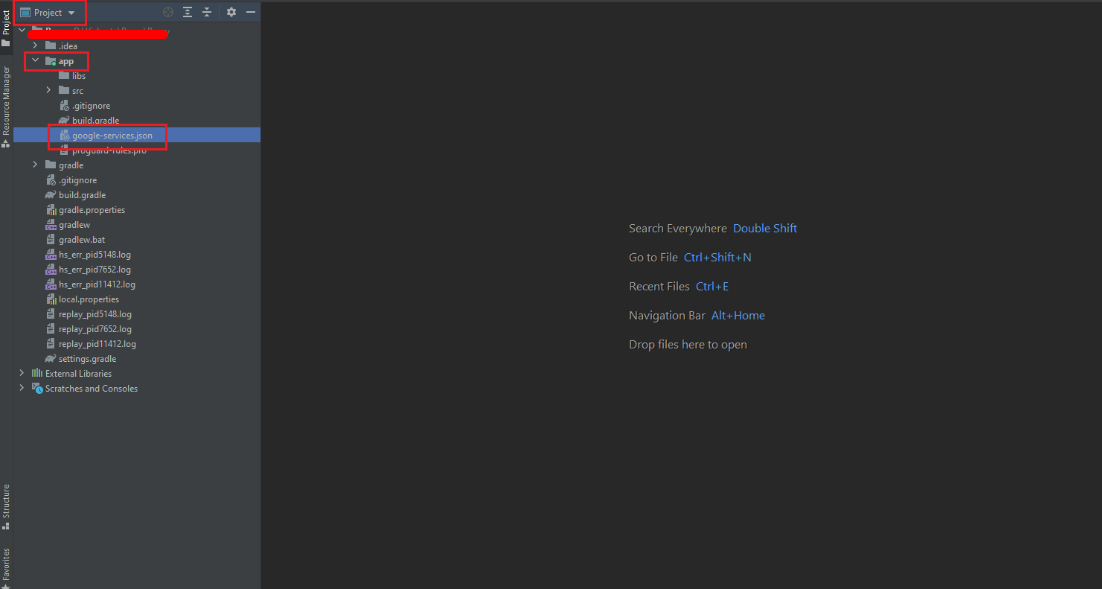
- Download the google-services.json file & place it in your project's app root directory.
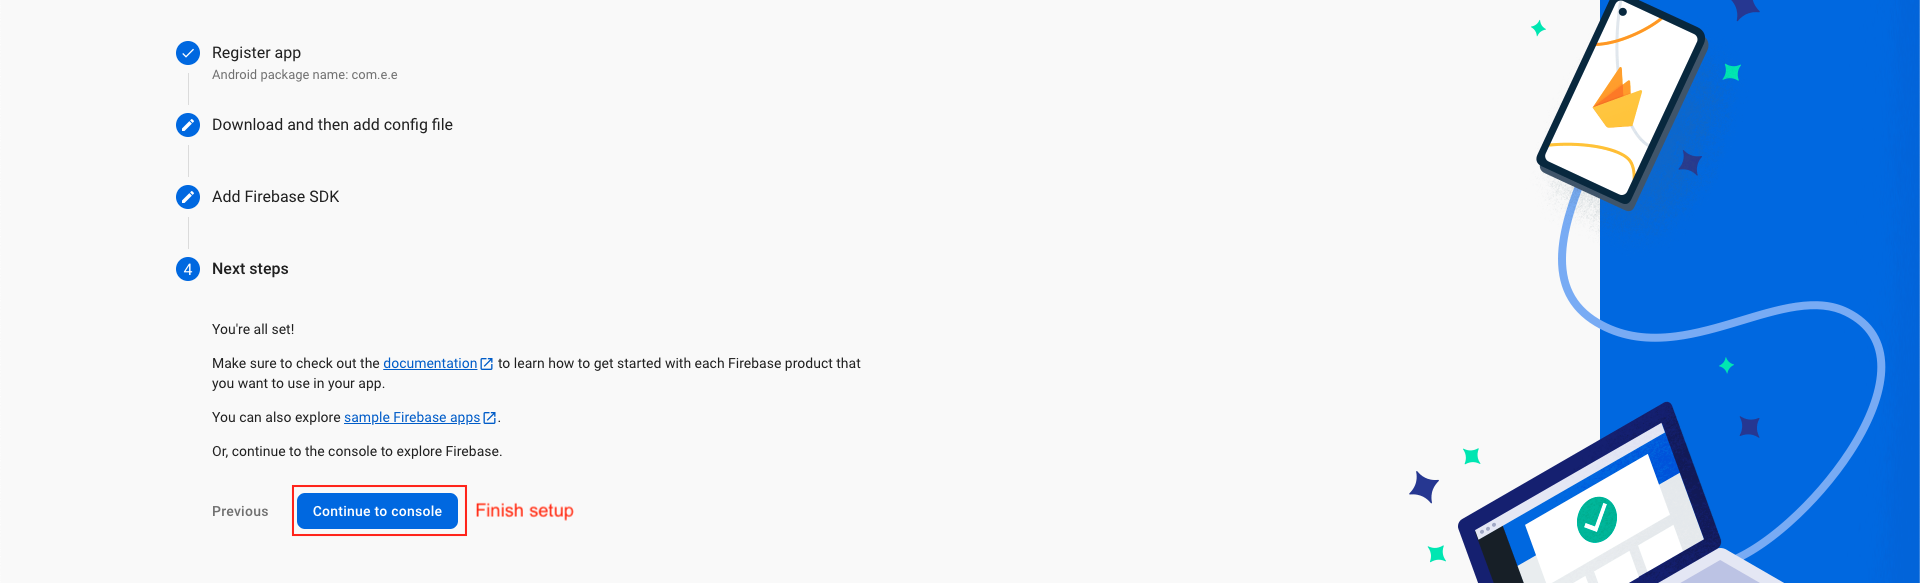
- Back in the Firebase console-setup workflow, click Next to skip the remaining steps and then finish and complete
Enter SHA Key in firebase console
- If you fail to provide the SHA-1 key in the Firebase project, functionalities such as phone login and Google login will be impaired.
- It is essential to add your SHA-1 keys for both debug and live modes to ensure seamless operation.
Google Sign In Configuration
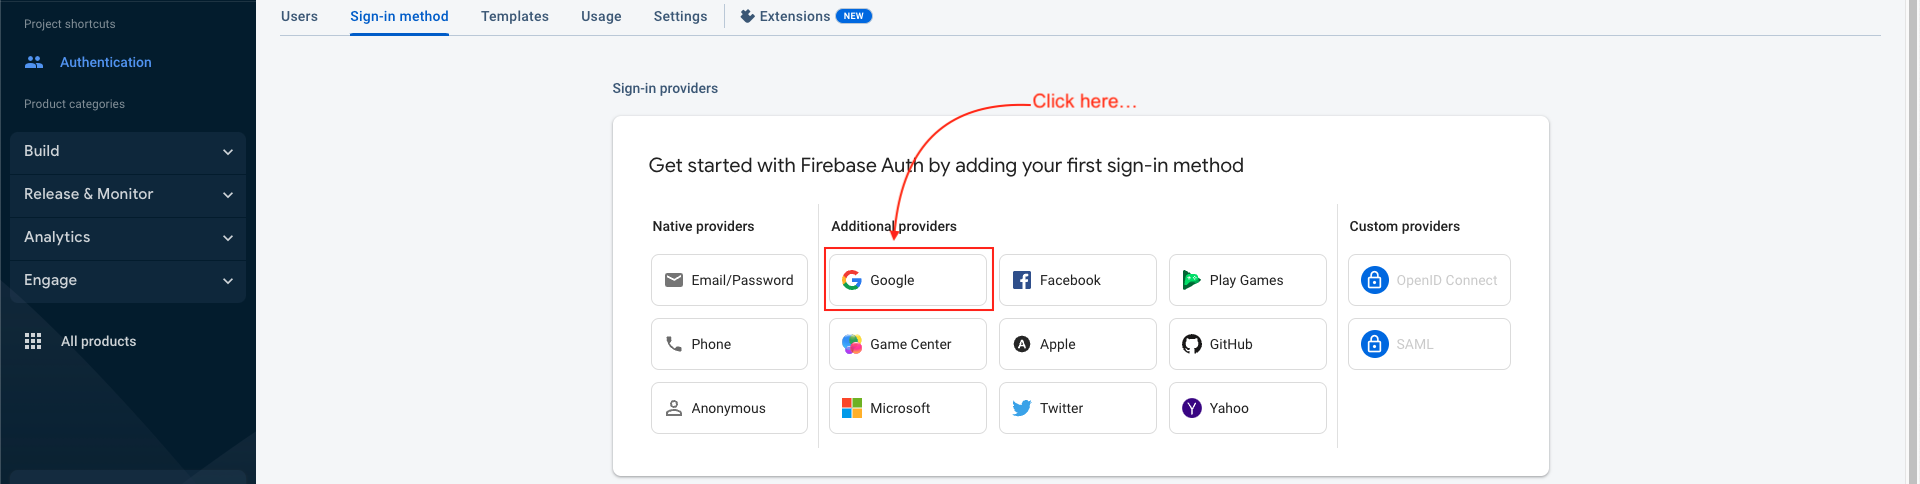
- Navigate to the "Authentication" section and select the "Sign-in method" tab.
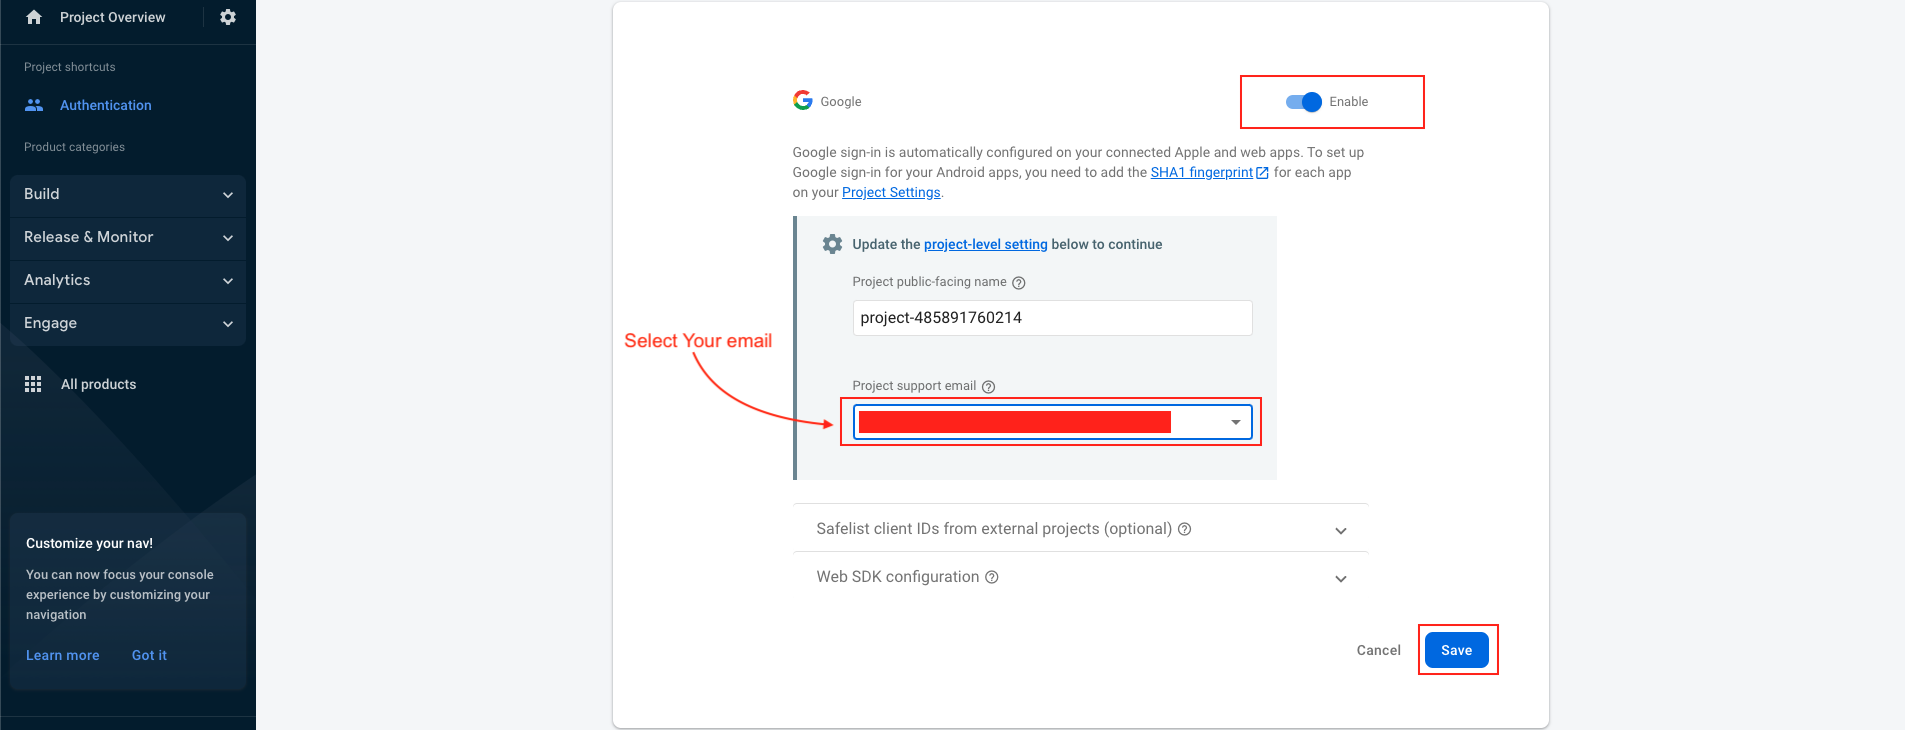
- Click to Enable
- Select your support email and save
- Google sign-in method has been successfully enabled.
.png)
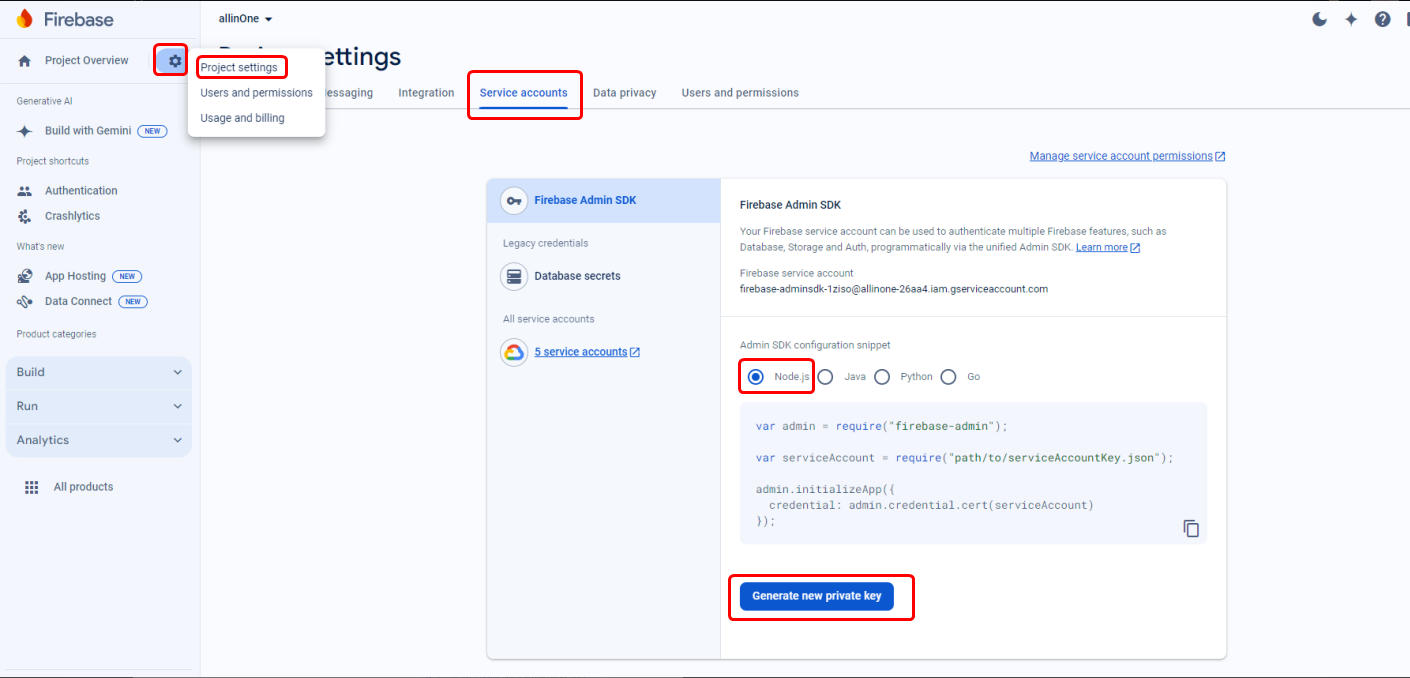
Download Firebase Private Key
- Here's a step-by-step guide to downloading your Firebase private key in a professional manner:
- If you have multiple projects, select the Firebase project for which you need the private key.
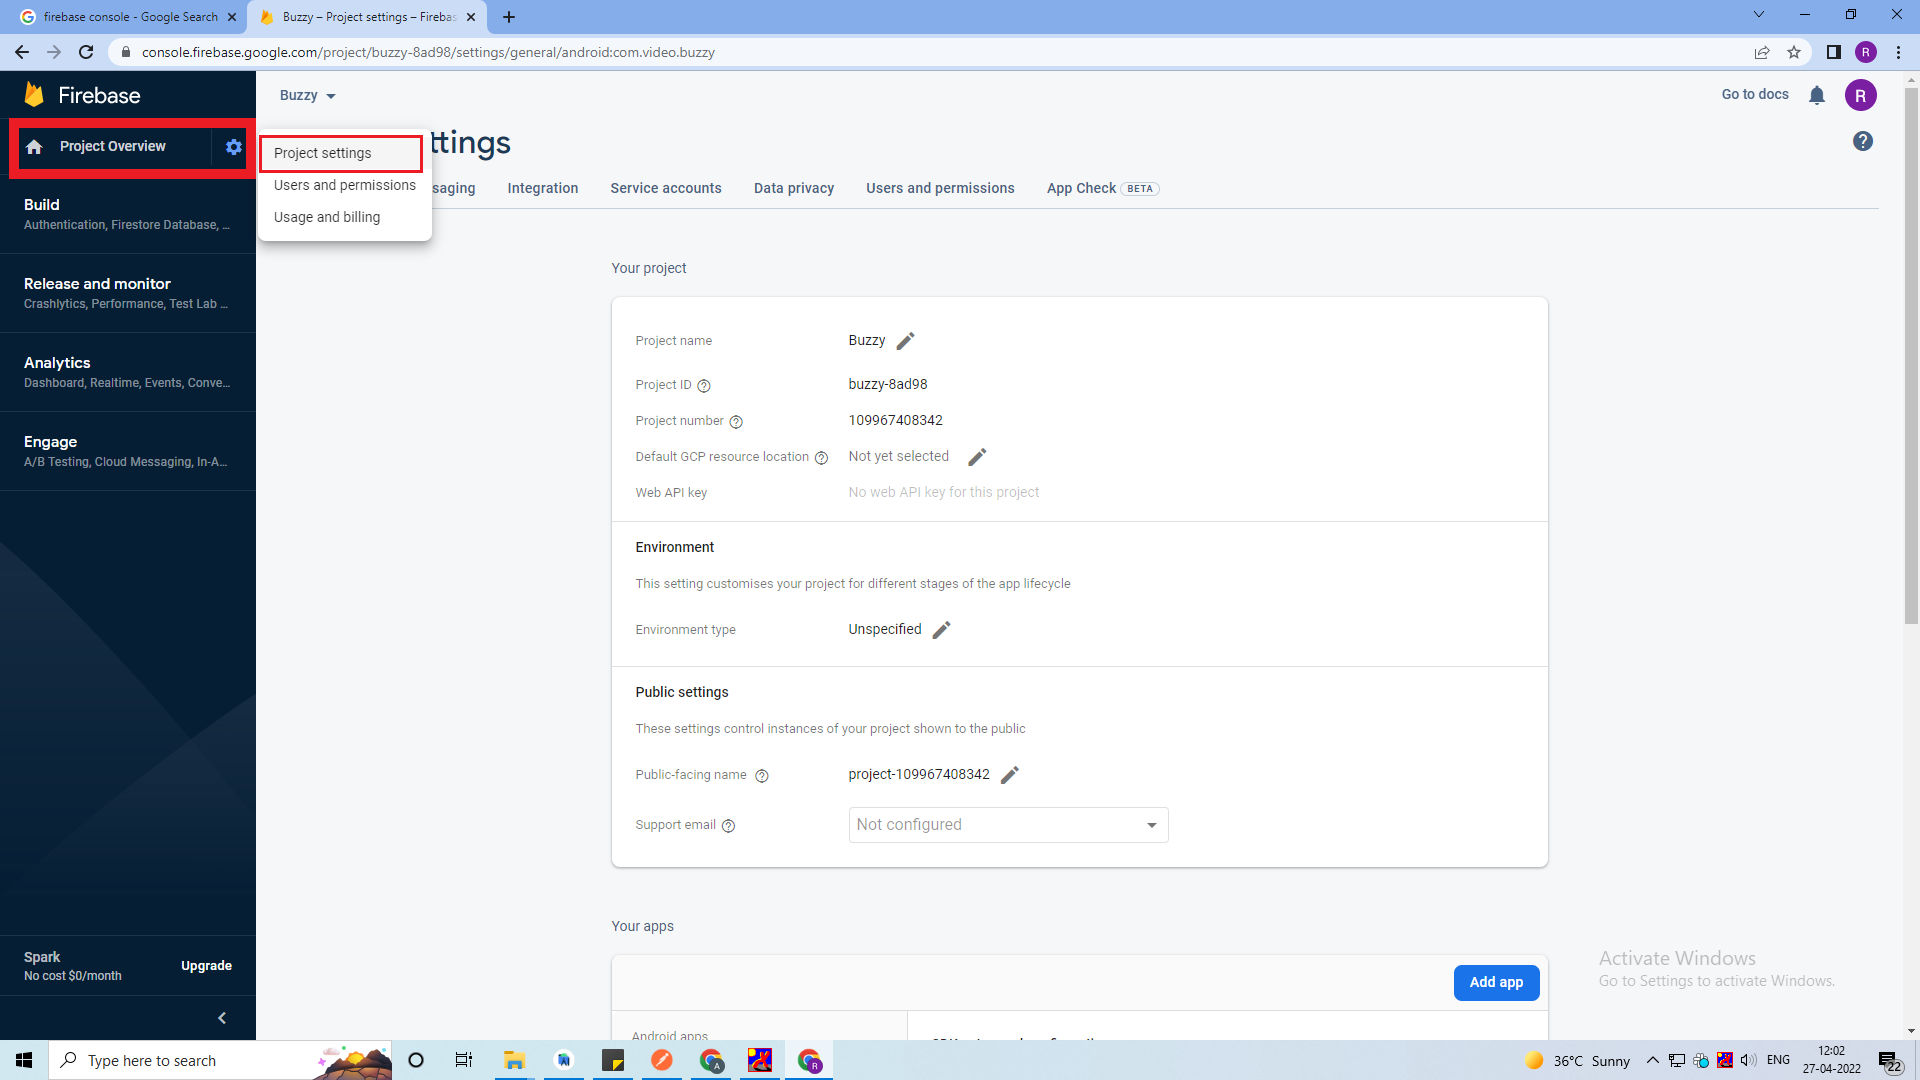
- Click on the gear icon (Settings) next to "Project Overview" on the top left corner of the Firebase Console.
- In the project settings, navigate to the "Service Accounts" tab.
- Scroll down to the "Firebase Admin SDK" section.
- Click on the "Generate New Private Key" button.
- A prompt will appear asking you to confirm your action.
- Once downloaded, store the JSON file containing the private key securely on your local machine.
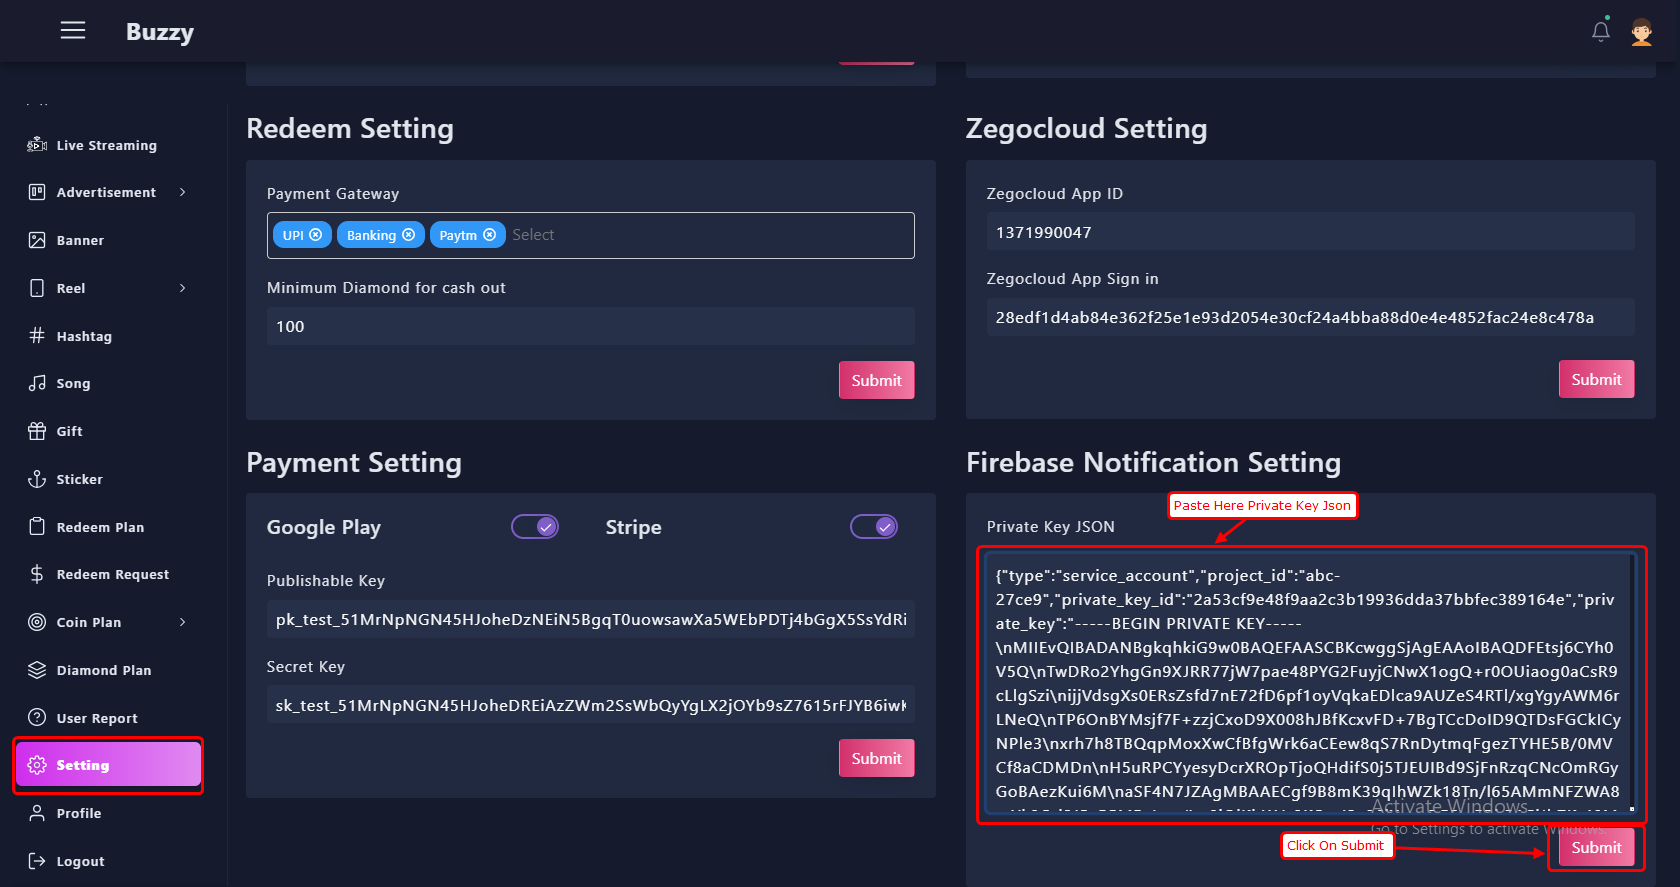
- Please update the downloaded private key file in the 'Private Key' section of the Firebase Notification settings.
SetUp Agora
- How to setup project at agora and getting credentials
- Sign up at theAgora Console.
- Navigate to the sidebar and click on "Project Management."
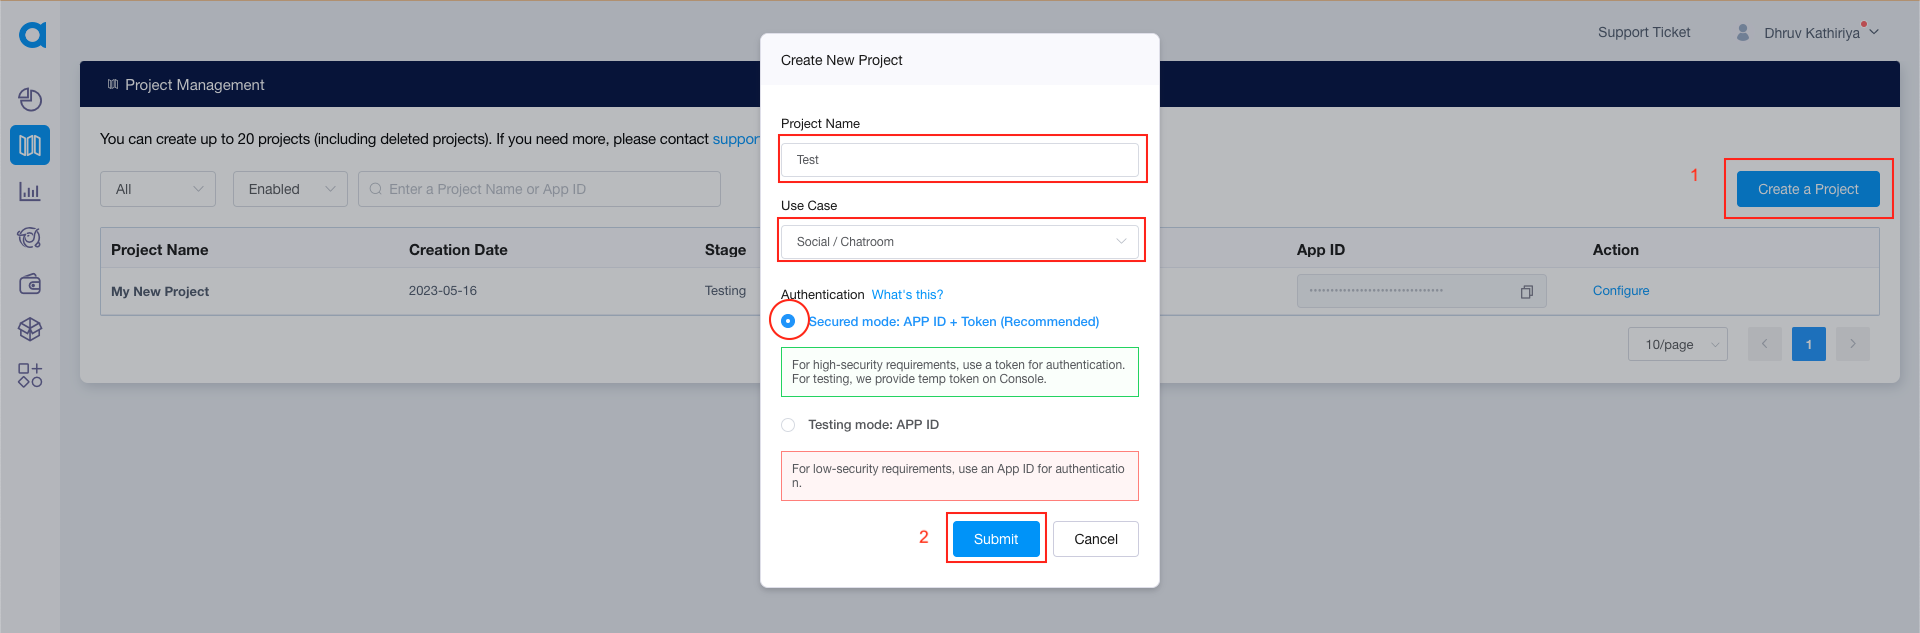
- Select "Create New Project."
- Fill in all the required information.
- Click on "Submit" to finalize the creation of your new project.
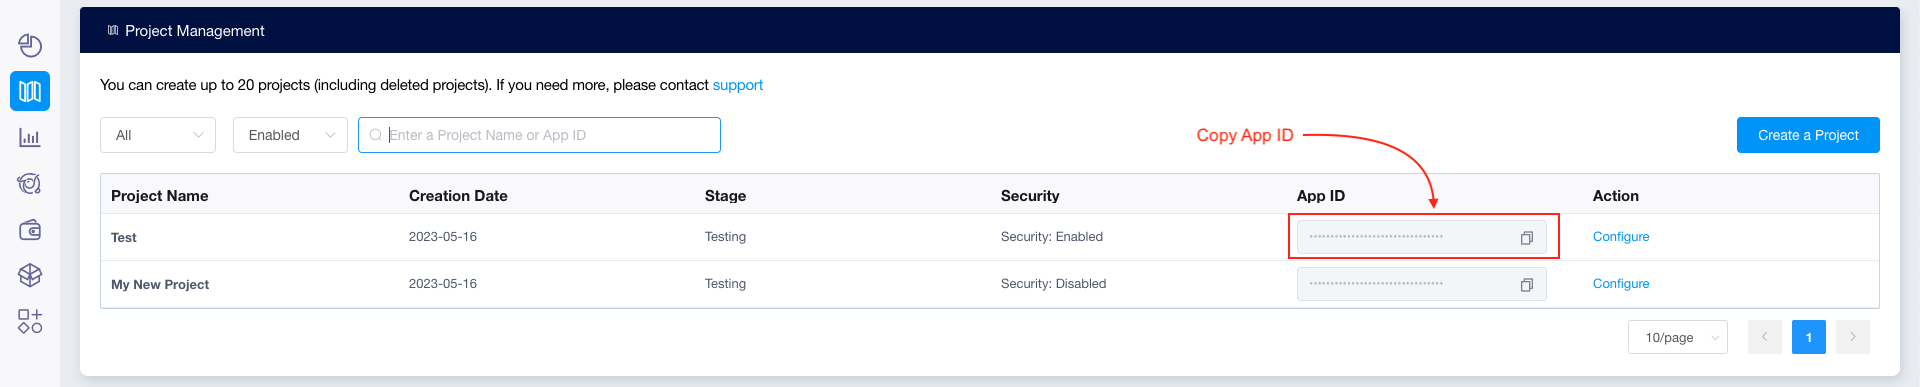
- Once your project is created, copy the Agora App ID for future use.
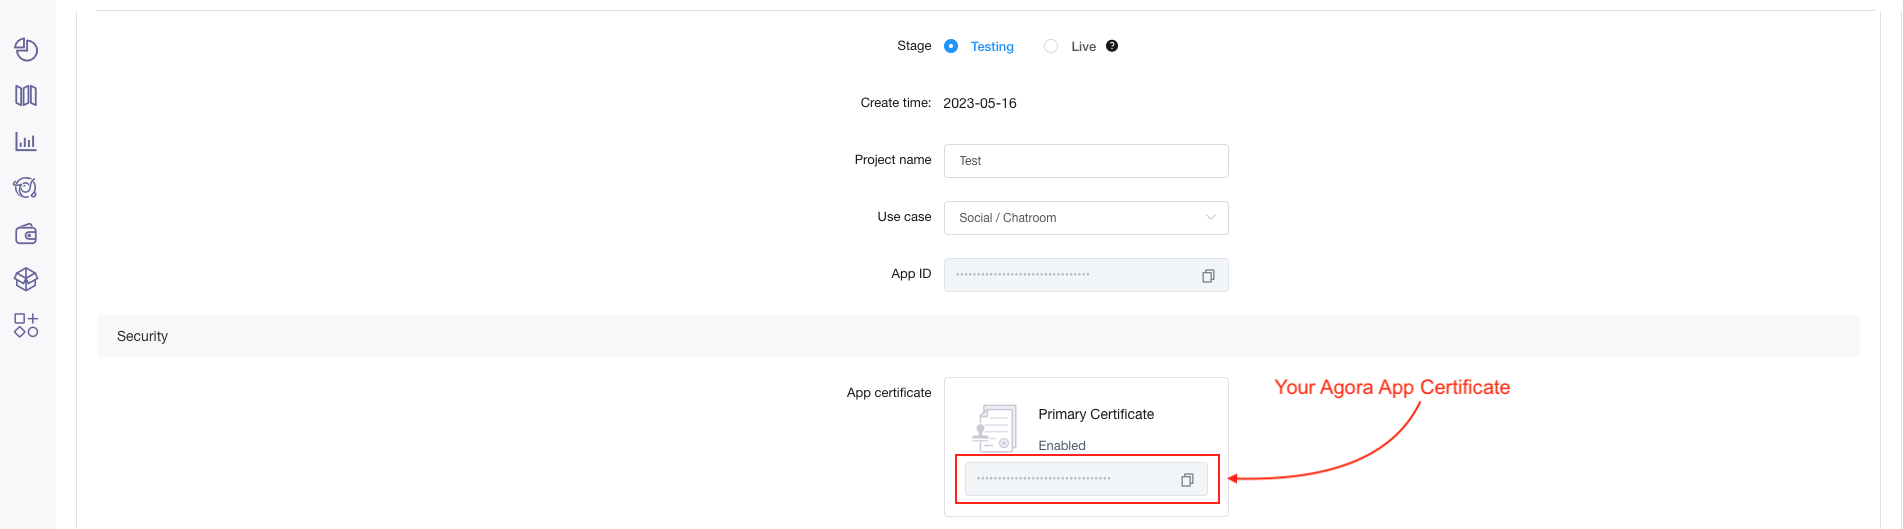
- Click on the "Configure" button. This will display the configuration page as shown below.
- On the configuration page, copy the Agora App Certificate for future use.
- This process allows you to obtain the App ID and App Certificate for your Agora project from the console.

SetUp in App Purchase
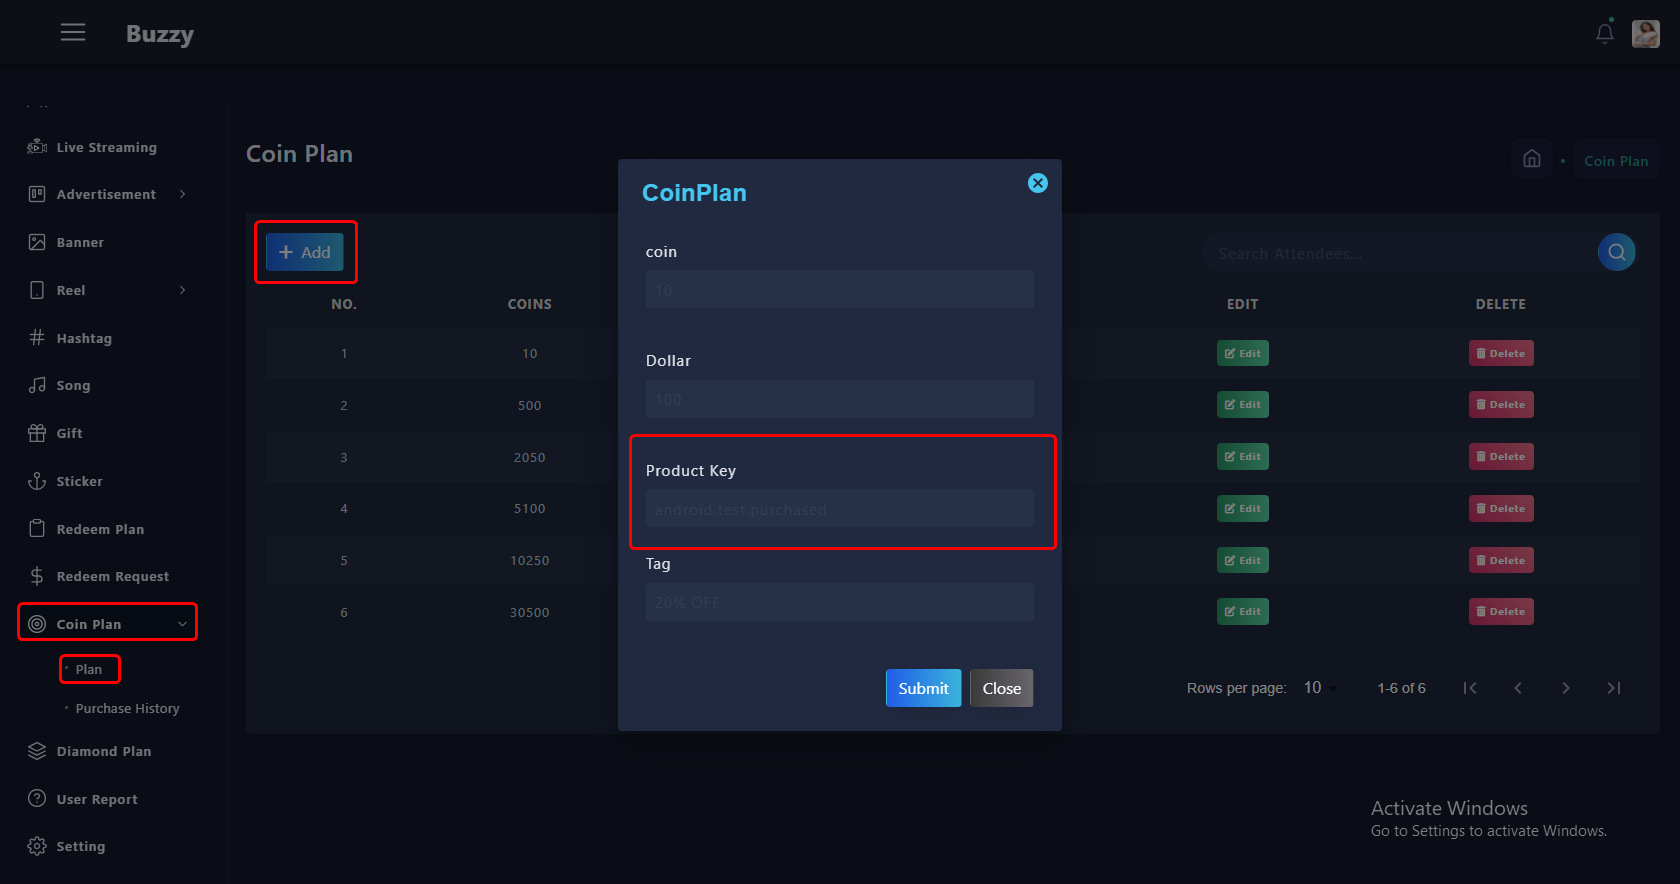
- First, generate a product in the Google Play Console and provide the Product ID.
- To create coin plans in the admin panel, follow these steps:
- Navigate to the admin panel.
- Click on "New" Coin Plan.
- Set the price, diamonds, and the Product ID (a unique Product ID you created as per the documentation).
- Click "Submit" to save the coin plan.
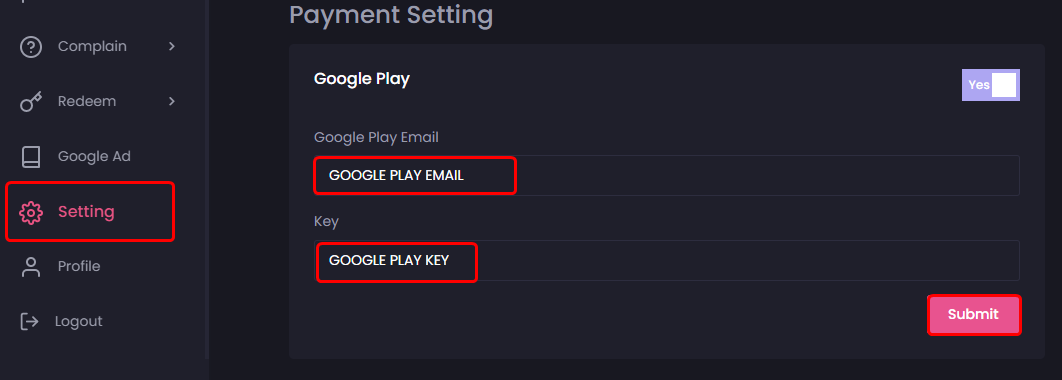
- Please enter your Google Play email and API key here.
Extract The Project
- To import the app, open Android Studio and proceed to import or open the template. Ensure that you wait for all processes, including the Gradle Build, to complete before proceeding to the next step.
- Additional steps: Sometimes, the Gradle Build may fail due to missing components. If Android Studio prompts you to download additional SDK components in the 'messages' tab, follow the instructions provided to install and download these components. This ensures a successful build of your project.
.png)
.png)
.png)
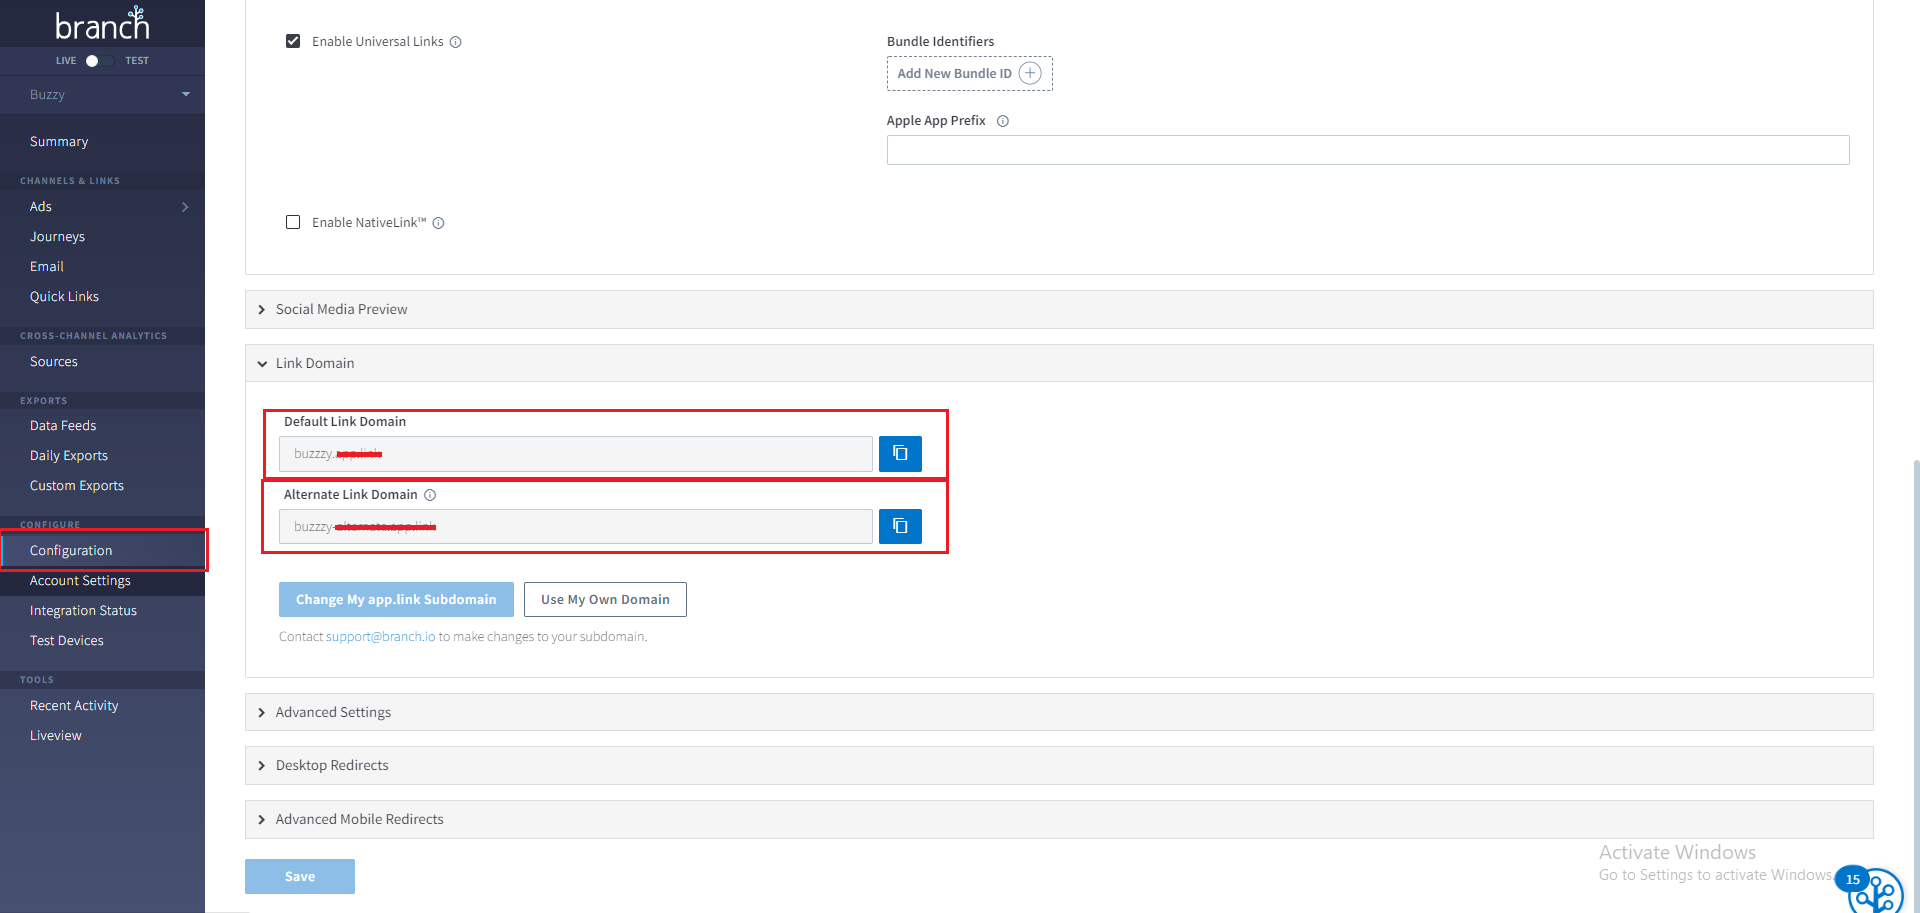
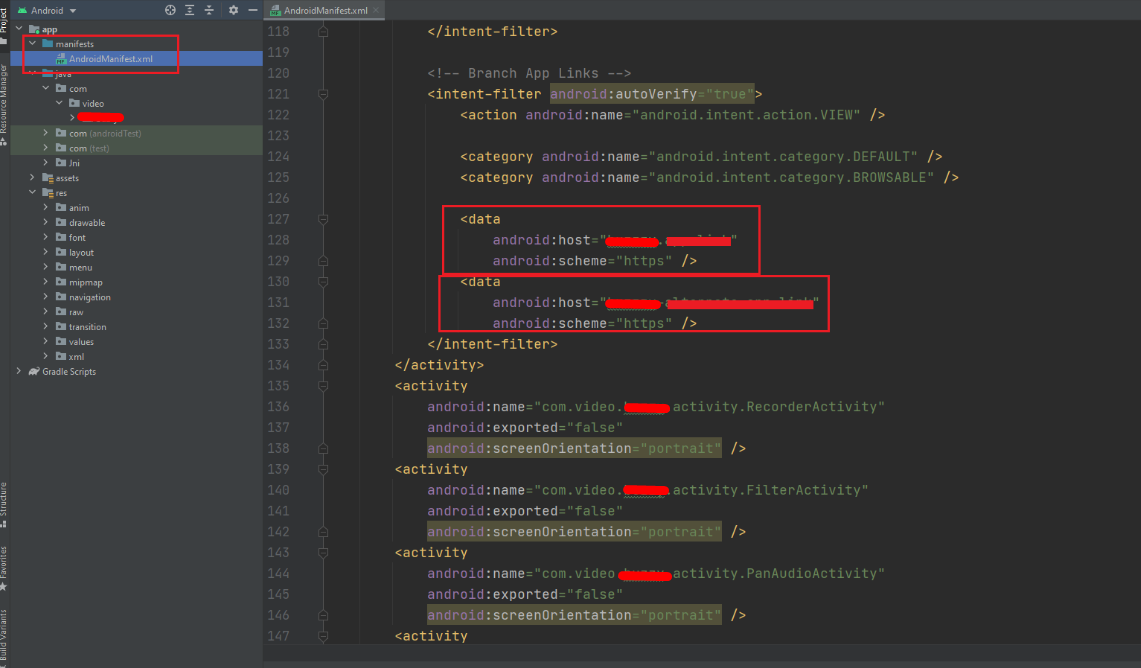
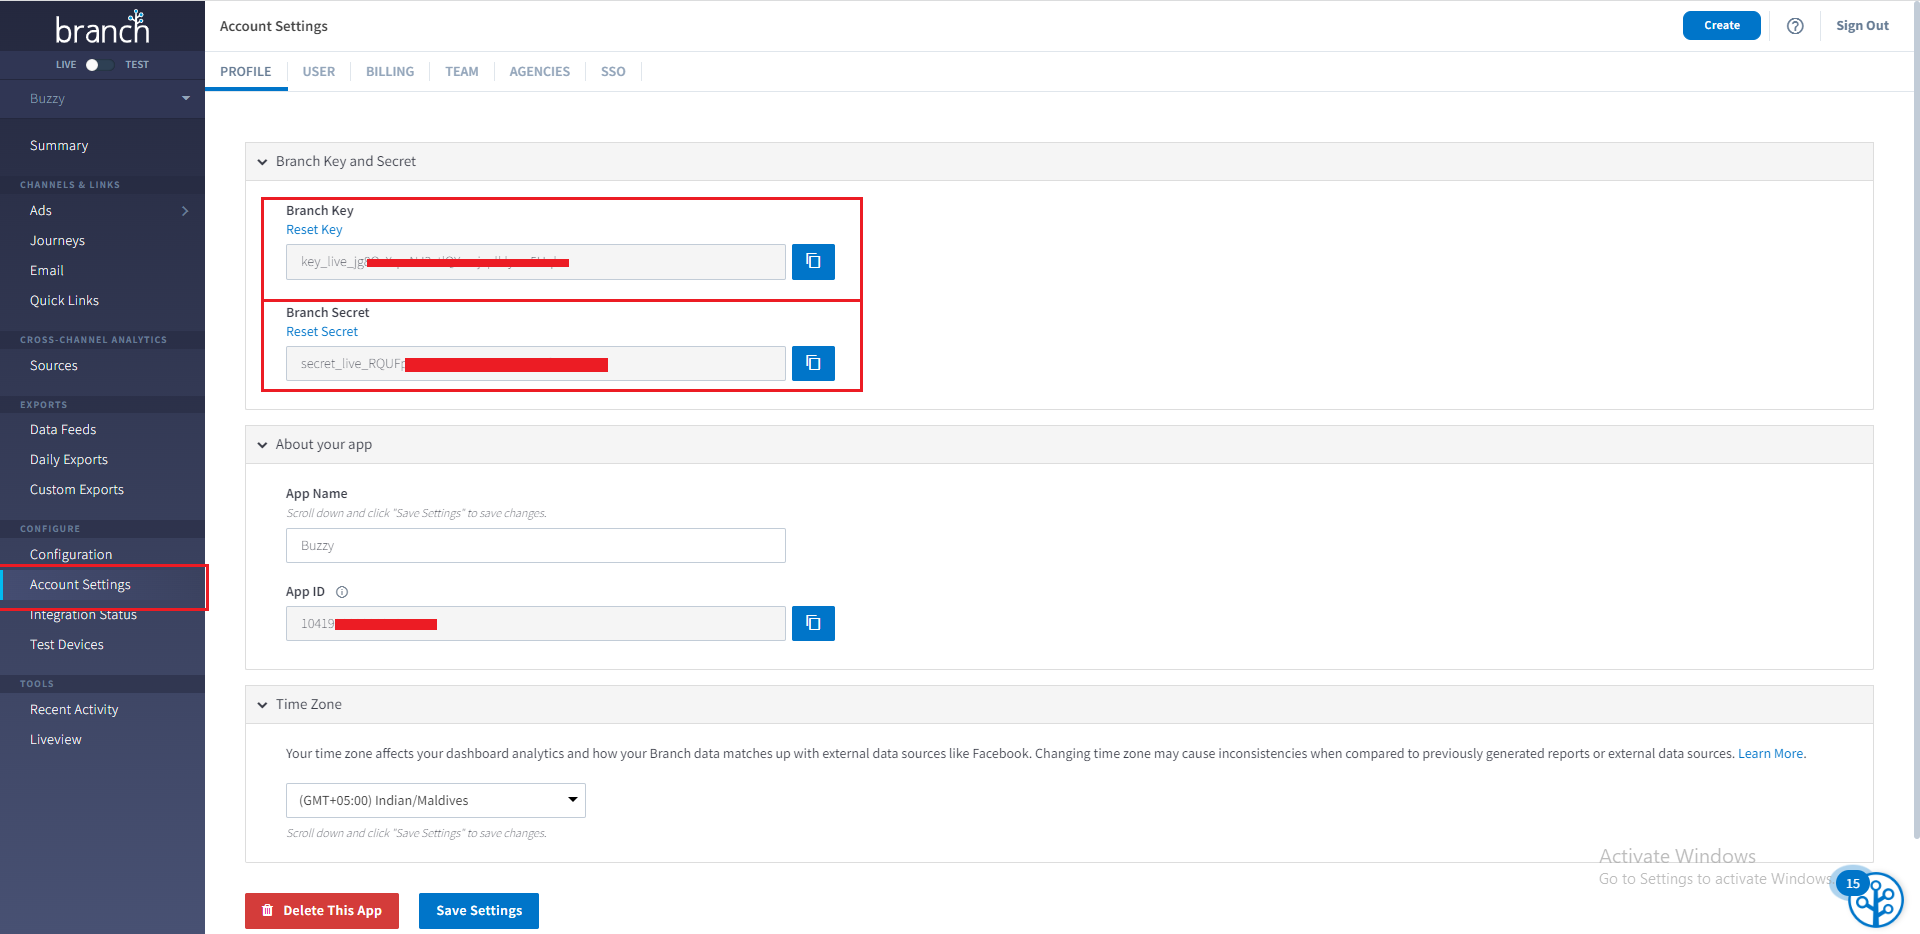
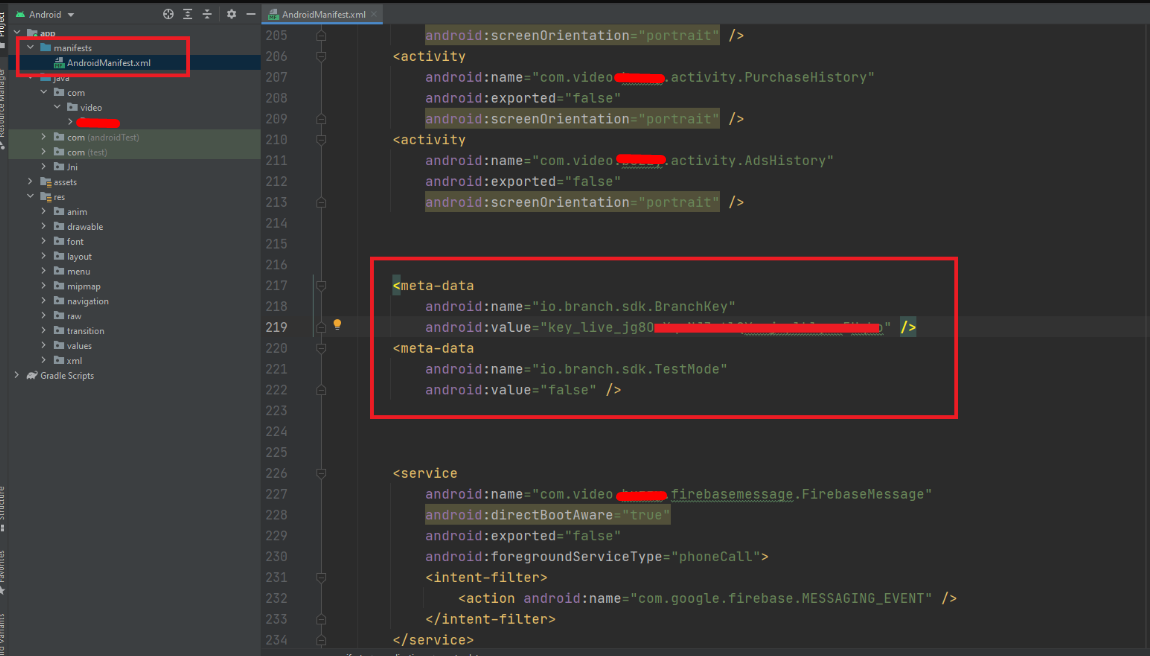
Setup Branch IO
- To create a Branch.io account and project, please follow these steps:
- Click hereto visit Branch.io and create your account.
- Once logged in, navigate to create a new project within the Branch.io dashboard.
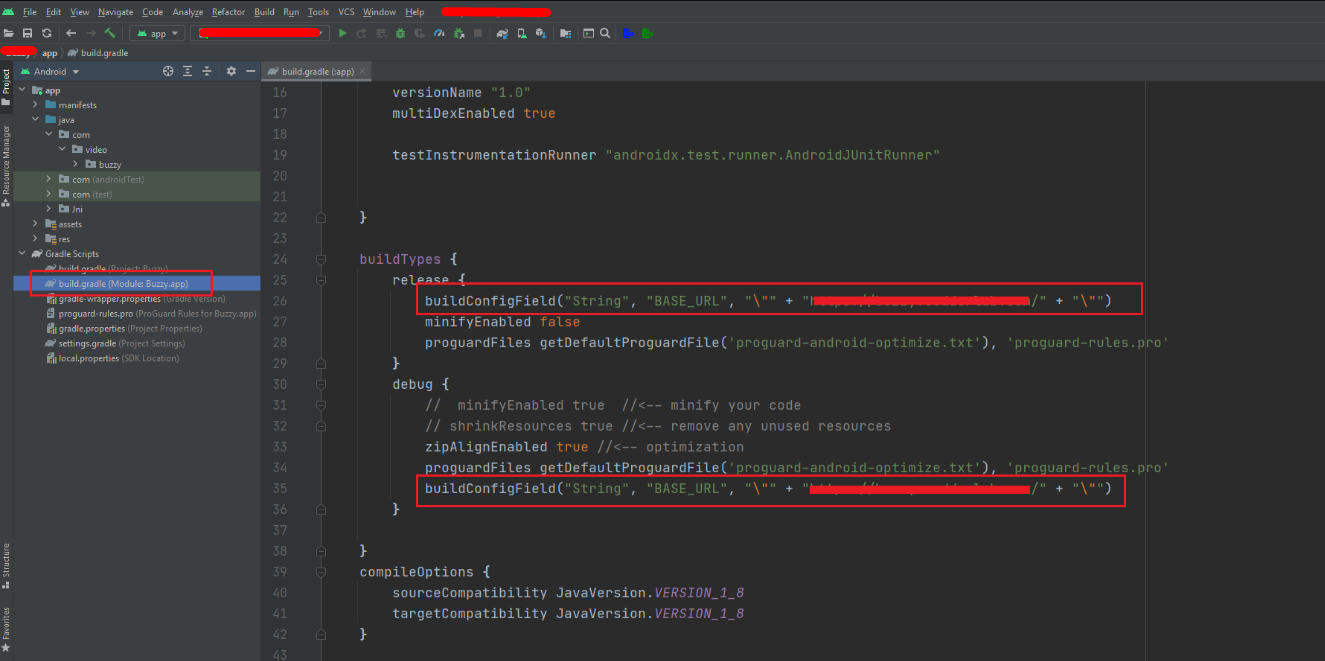
Change baseURL And secretKey
- To update the baseURL and secretKey in your Android project, follow these steps:
- Navigate to Android Studio.
- Locate the build.gradle file under "Android -> Gradle Scripts".
- Modify the baseURL and secretKey variables as specified in theAdmin Panel documentation.
- Ensure that these values are consistently applied across your backend, frontend, and app code to maintain uniform security measures.
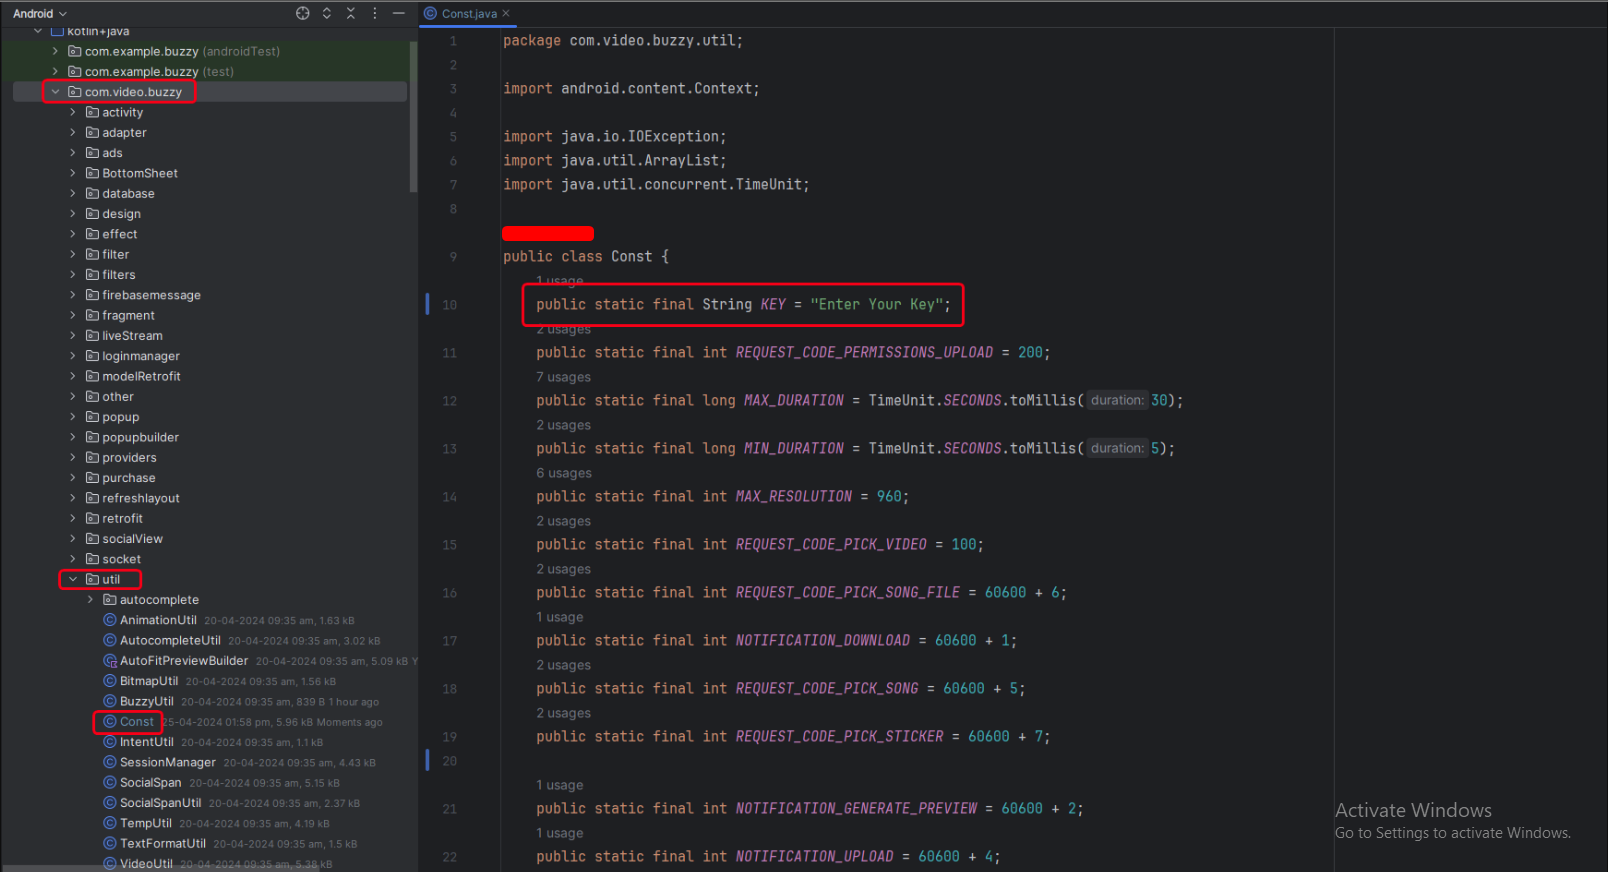
- To access the Retrofit builder in your Android project, follow these steps:
- Navigate to your Android project directory structure.
- Locate the file where you have defined your Retrofit instance. This is typically found in a class where Retrofit is initialized and configured, often named something like "ApiClient.java or "RetrofitClient.java.
- Open this file to find the Retrofit builder setup.
- Here, you can modify settings such as base URL, headers, timeouts, and other configurations as required by your backend API. Adjust these settings according to the specifications provided in your project's documentation.
Change Package Name
- You can update the package name as shown in the image below.
Change App Name and Icon
- Below is a guide on how to change the application name:
- Navigate to "app -> res -> values -> strings.xml.
.png)
- To set your app icon named 'ic_launcher.png' in the specified folders with various sizes for different screen densities, follow these steps:
- Navigate to "your project directory: Android source code -> Facecast -> app -> src -> main
- Place 'ic_launcher.png' in the following directories:
- res/drawable-mdpi (48px x 48px)
- res/drawable-hdpi (72px x 72px)
- res/drawable-xhdpi (96px x 96px)
- res/drawable-xxhdpi (144px x 144px)
- res/mipmap-xxxhdpi (192px x 192px)
- For assistance with resizing or creating new icons, you can use tools like the Android Asset Studio -Launcher Icon Generator
.png)
.png)
Change Color And Theme
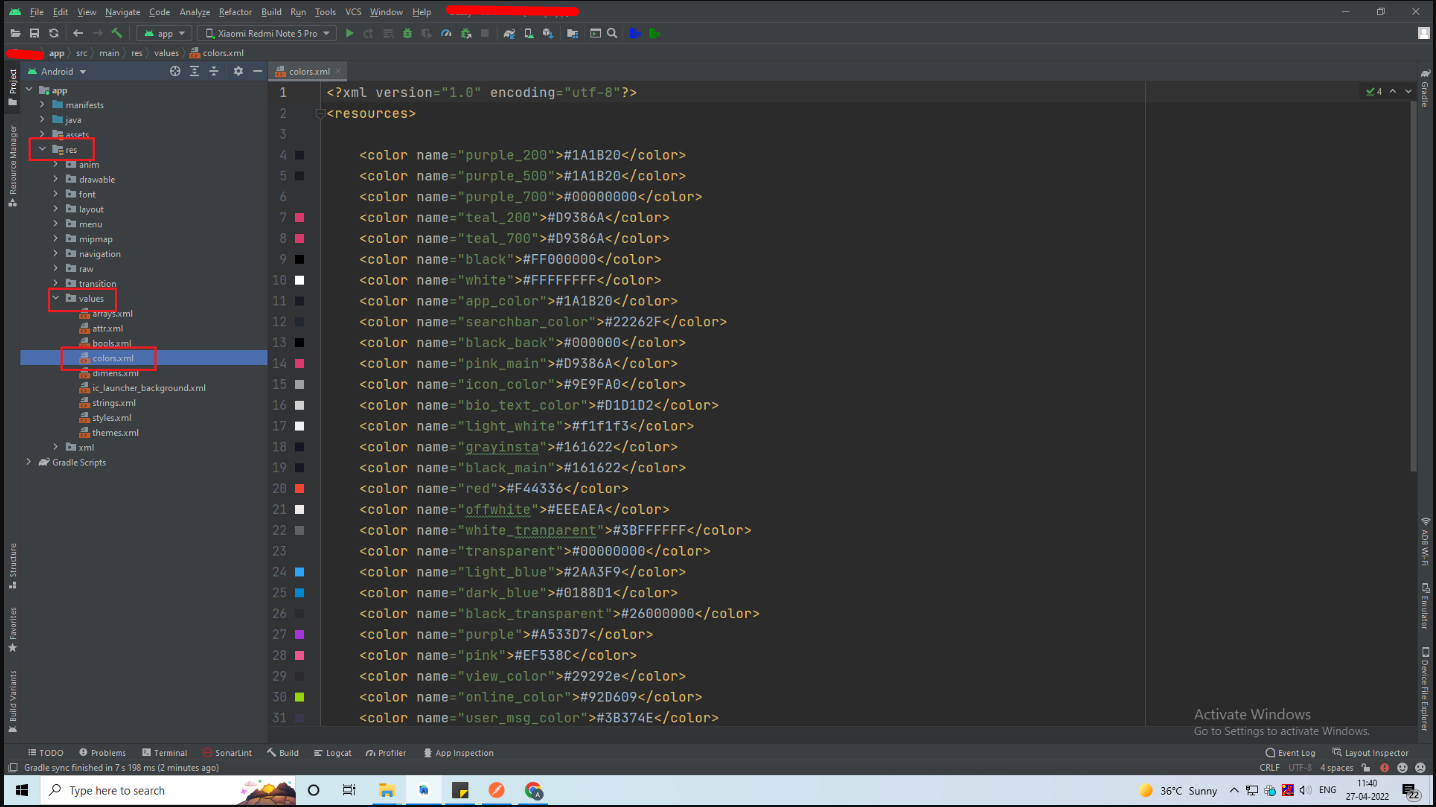
- To change the color scheme of your application, follow these steps:
- Navigate to "app -> res -> values -> colors.xml".
- Modify the colors in this file to customize your app’s appearance. The primary color sets the theme for the Toolbar, buttons, and headers, while the primary dark color is used for elements such as the status bar.
- For additional color inspiration and options, visitMaterial Design Color Palette.
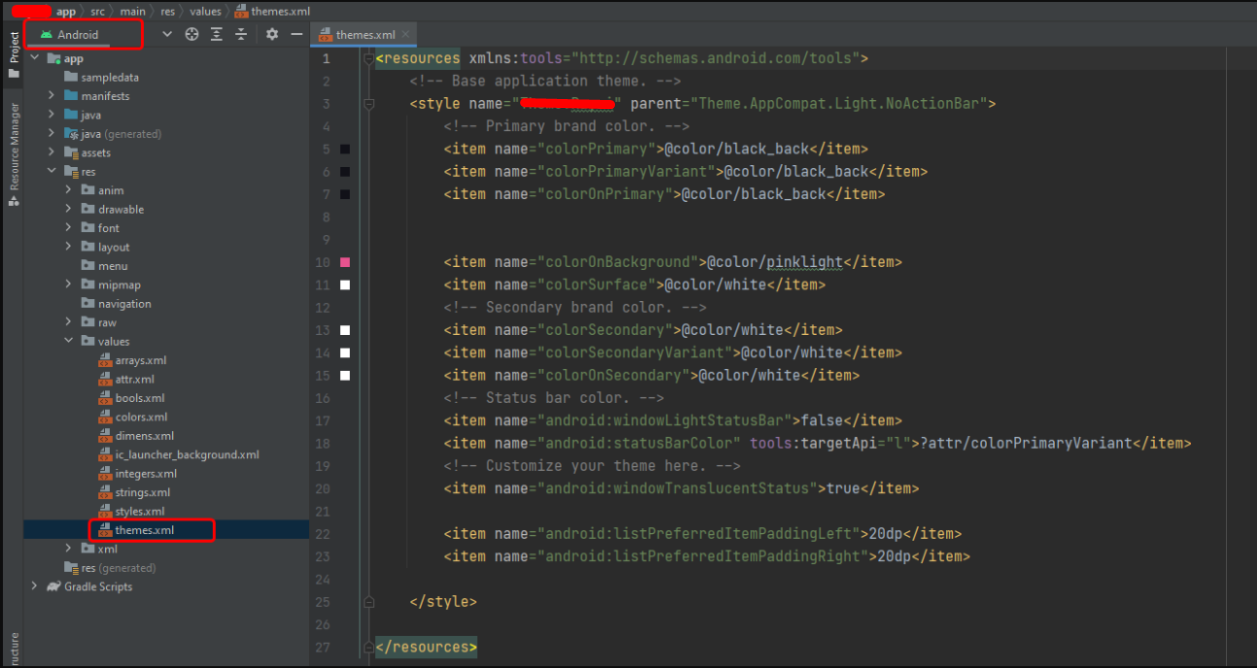
- Above is an illustration of how you can customize the theme of your application.
Change Splash Screen
- Please place a PNG file named 'splash.png' in the following directory:
- Navigate to your project directory: Android source code -> Facecast -> app -> src -> main -> res -> drawable
.png)
.png)
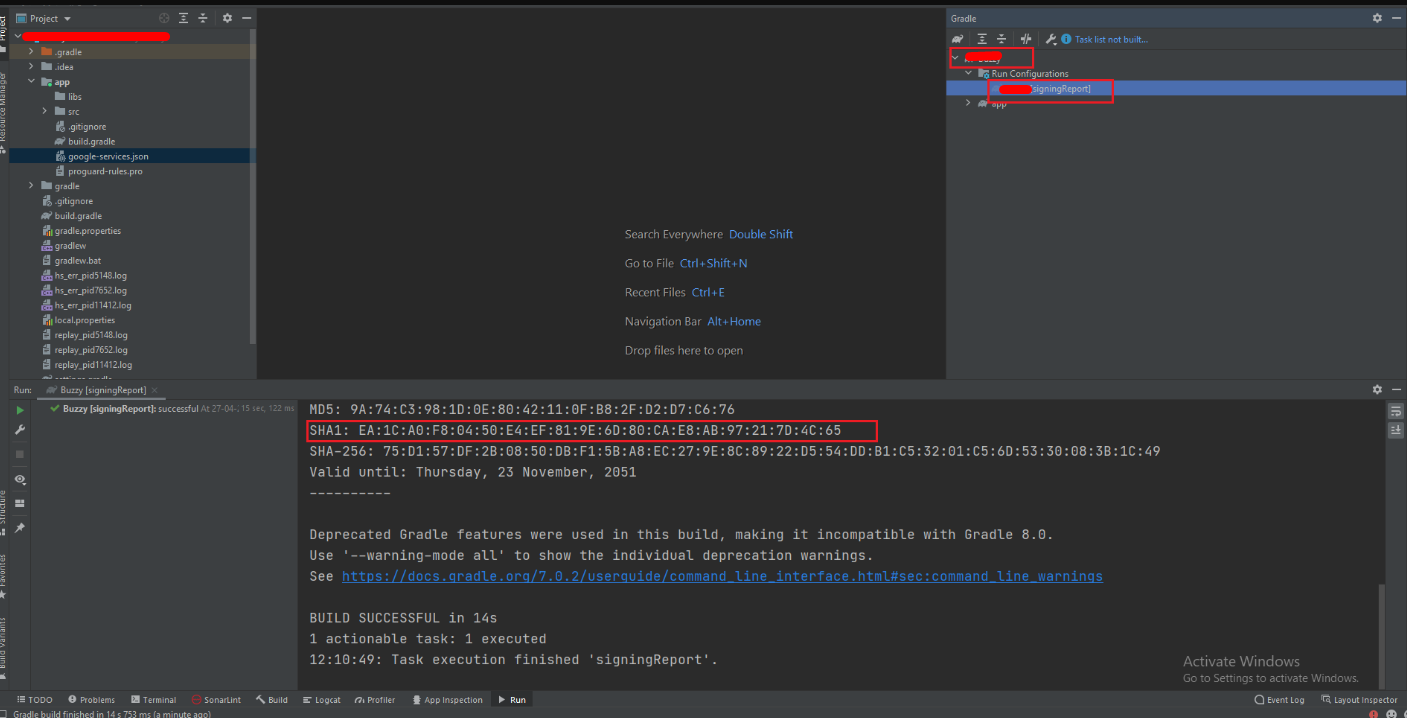
Get SHA-1 Key
- To obtain the SHA1 and MD5 fingerprints in Android Studio, follow these steps:
- Launch Android Studio.
- Open your project.
- Click on "Gradle" from the right-side panel (Gradle Bar).
- Click on the "Refresh" icon to synchronize your project with Gradle.
- In the Gradle Bar, navigate to your project (root directory) under "Your Project Name."
- Click on "Tasks."
- Expand "Android."
- Double-click on "signingReport." This action will generate the SHA1 and MD5 fingerprints.
- The fingerprints will appear in the Run Bar or Gradle Console. Ensure to select the app module from the module selection dropdown to run or debug your application accordingly.
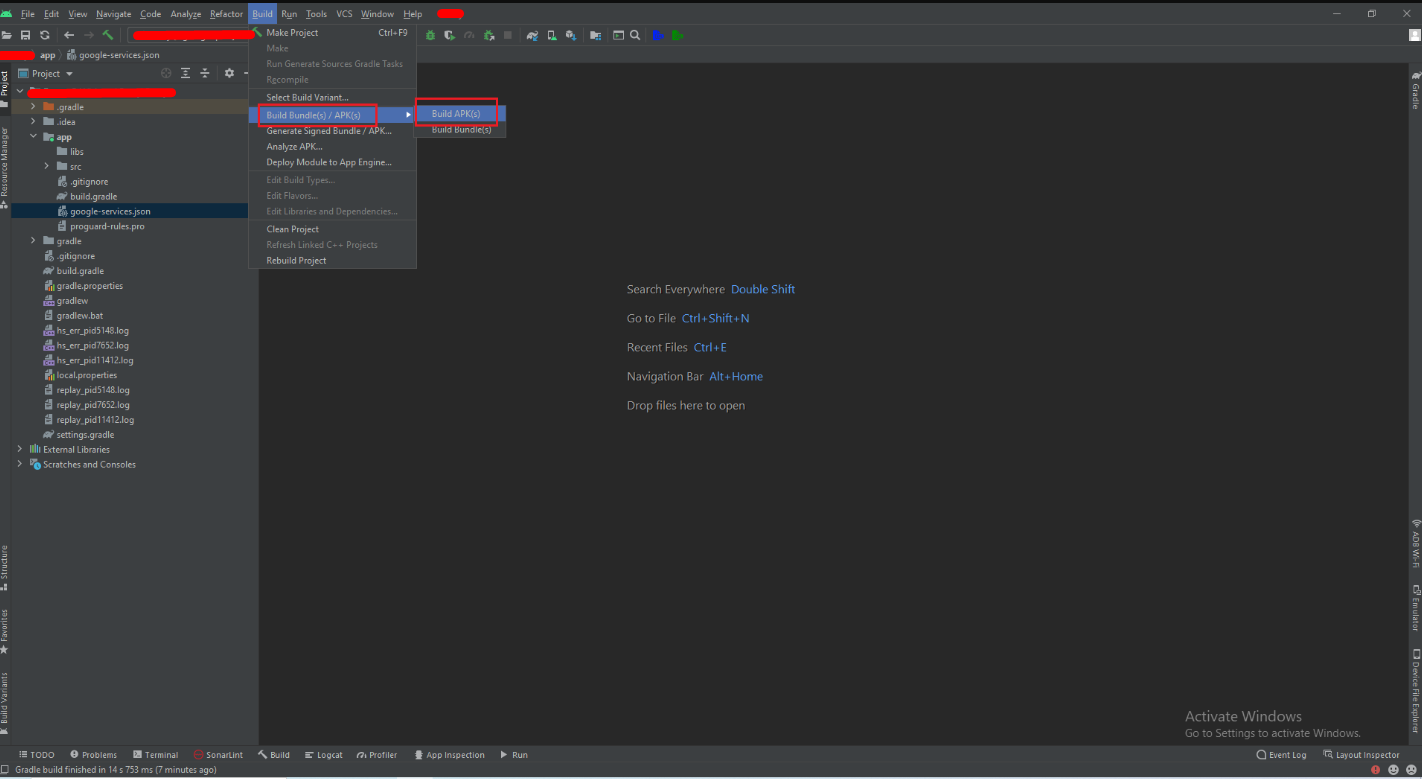
Generate Debug Apk
- Please refer to the image below for instructions on obtaining the debug APK.